Creating an order
While most orders connect automatically from your connected sales channels to BladePRO, you'll sometimes need to create orders manually. This article shows you how to create a new order directly in BladePRO.
Last updated 3 days ago
Before you begin
Make sure that you have the correct Order Channel set up for manual orders. You can find your current Order Channels from your Company Settings.
If you don't see the channel you need, contact your Account Manager to set one up.
Not sure how to find your Company Settings? Visit our support article here
Create a new order from the Order List
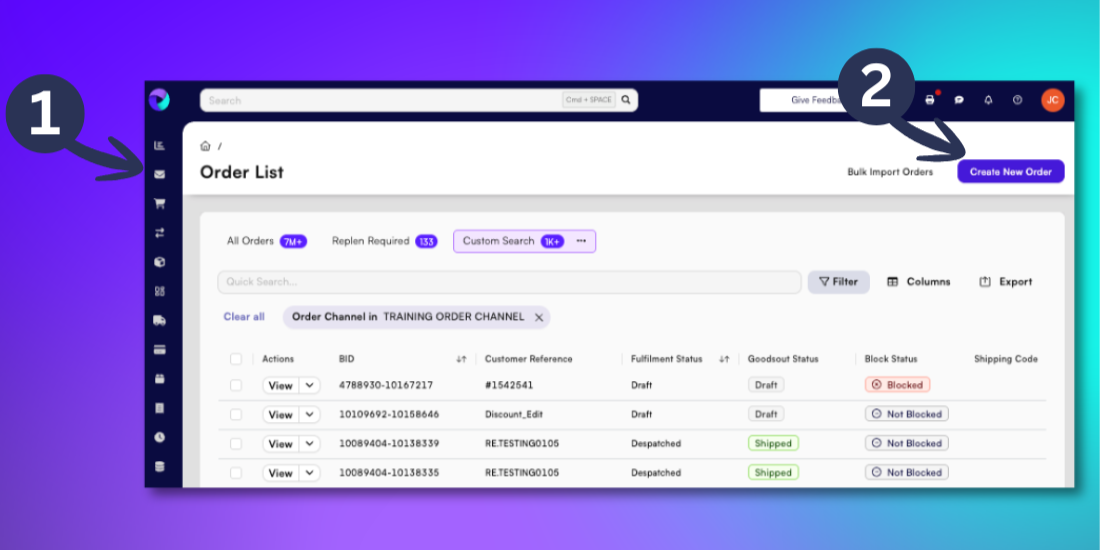
Click the Sales icon in the left-hand menu (look for the shopping trolley icon).
Click Create New Order
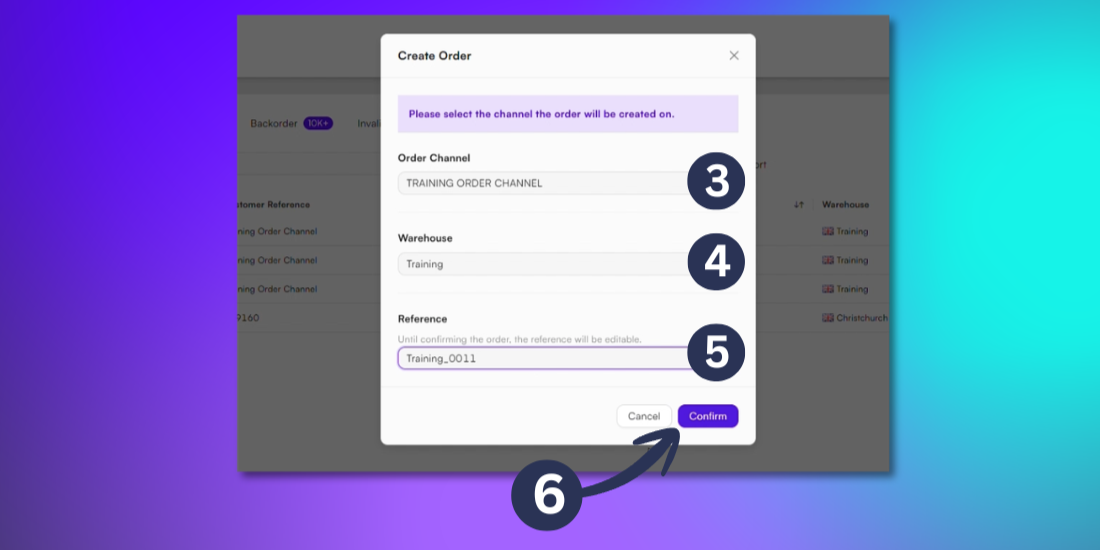
Select the Order Channel from the dropdown menu
Choose the Warehouse from the dropdown menu
Insert a unique order reference. This can be edited until order is confirmed.
Click Confirm to create your order.
Enter recipient details
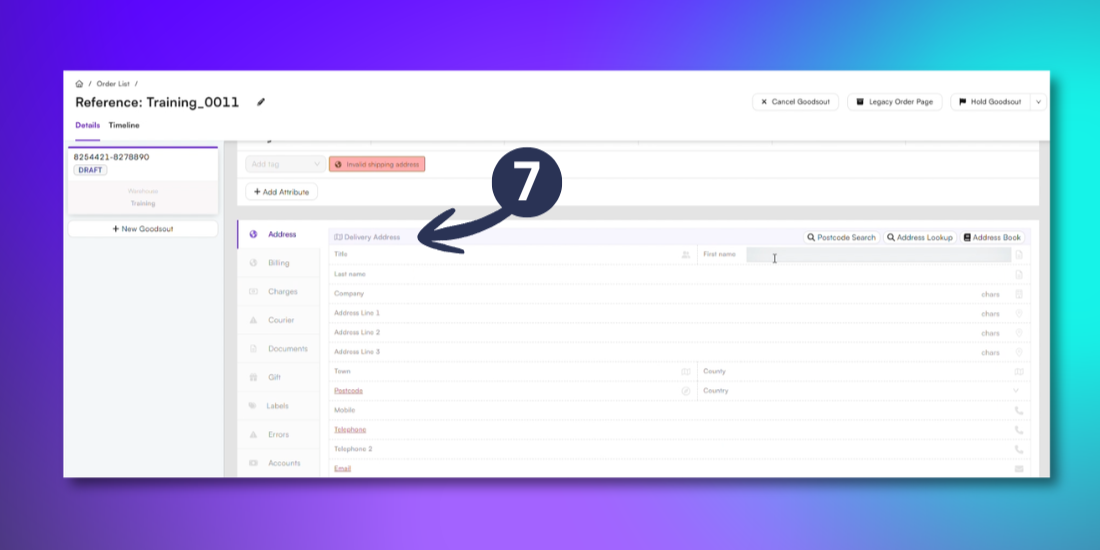
Add the recipient’s details/delivery details in the Address tab. Mandatory fields are highlighted in red.
Tip: If you know part of the recipient’s address you can use the Address Lookup feature to complete the address details. You can also use the Address Book option to pre-populate addresses from your contacts. For further guidance on using your Address Book click here
Add products to your order
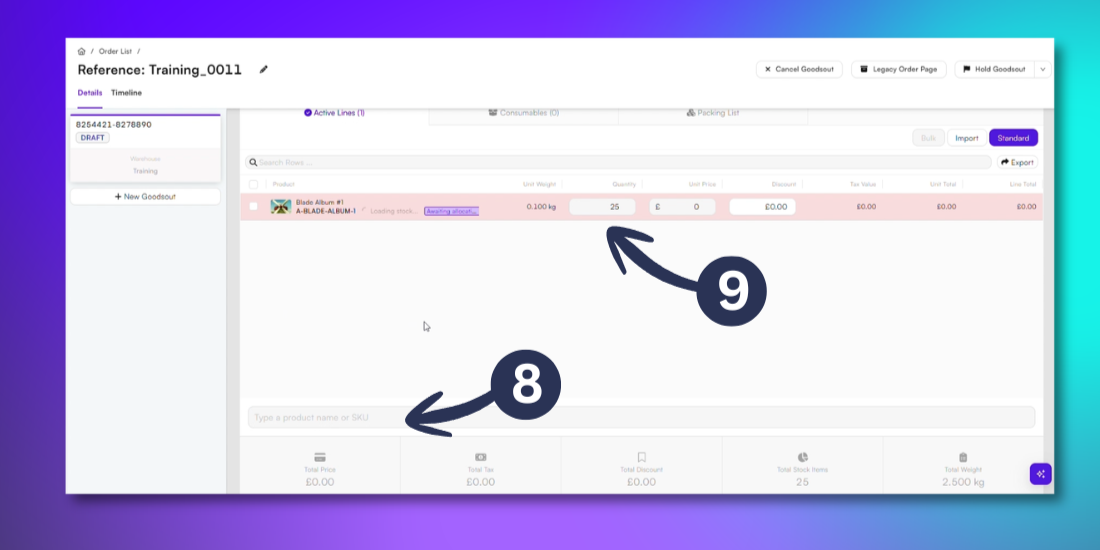
Scroll down to the Active Lines section. Search for products by typing either the product name or SKU into the search bar. Select the populated result to add the product to the order.
Once added, products appear as an Active Line. For each line item, you can update:
Quantity
Unit Price
Discount
Confirm Goodsout
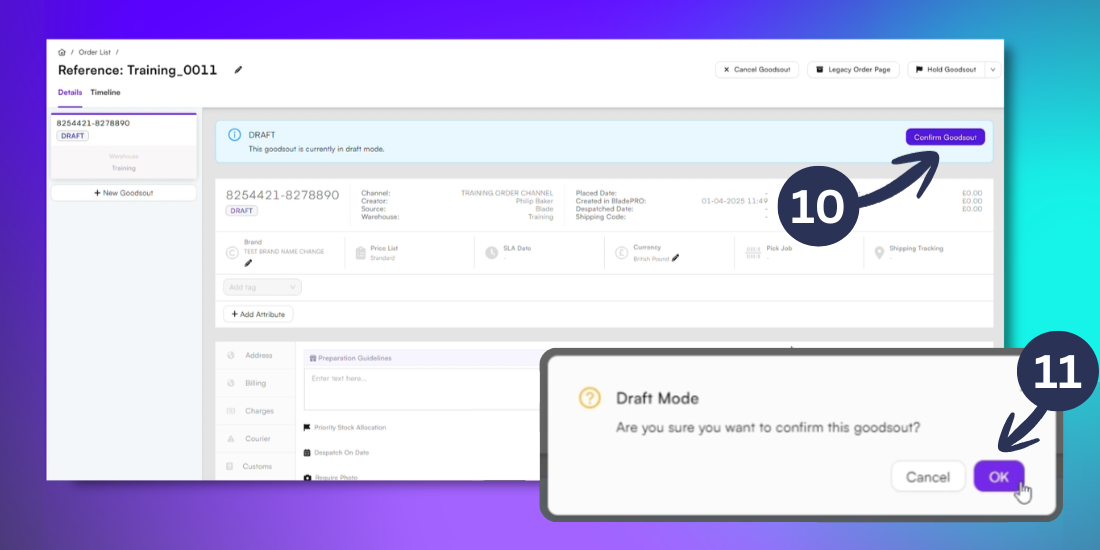
When finished editing the order, scroll back to the top of the page and click Confirm Goodsout.
Click OK in the confirmation popup.
Your new order has now been created and ready for processing in BladePRO.
Tip: Prior to confirming Goodsout the order is saved in a Draft status and is able to be edited. Once confirmed, the order moves into the fulfillment queue immediately.