Using the Tag Manager
The Tag Manager allows you to view and manage all of the tags which are used to categorise products and orders across your account in BladePRO. From the Tag Manager you can see usage data, edit tags and delete them if needed.
Last updated About 4 hours ago
Accessing the Tag Manager
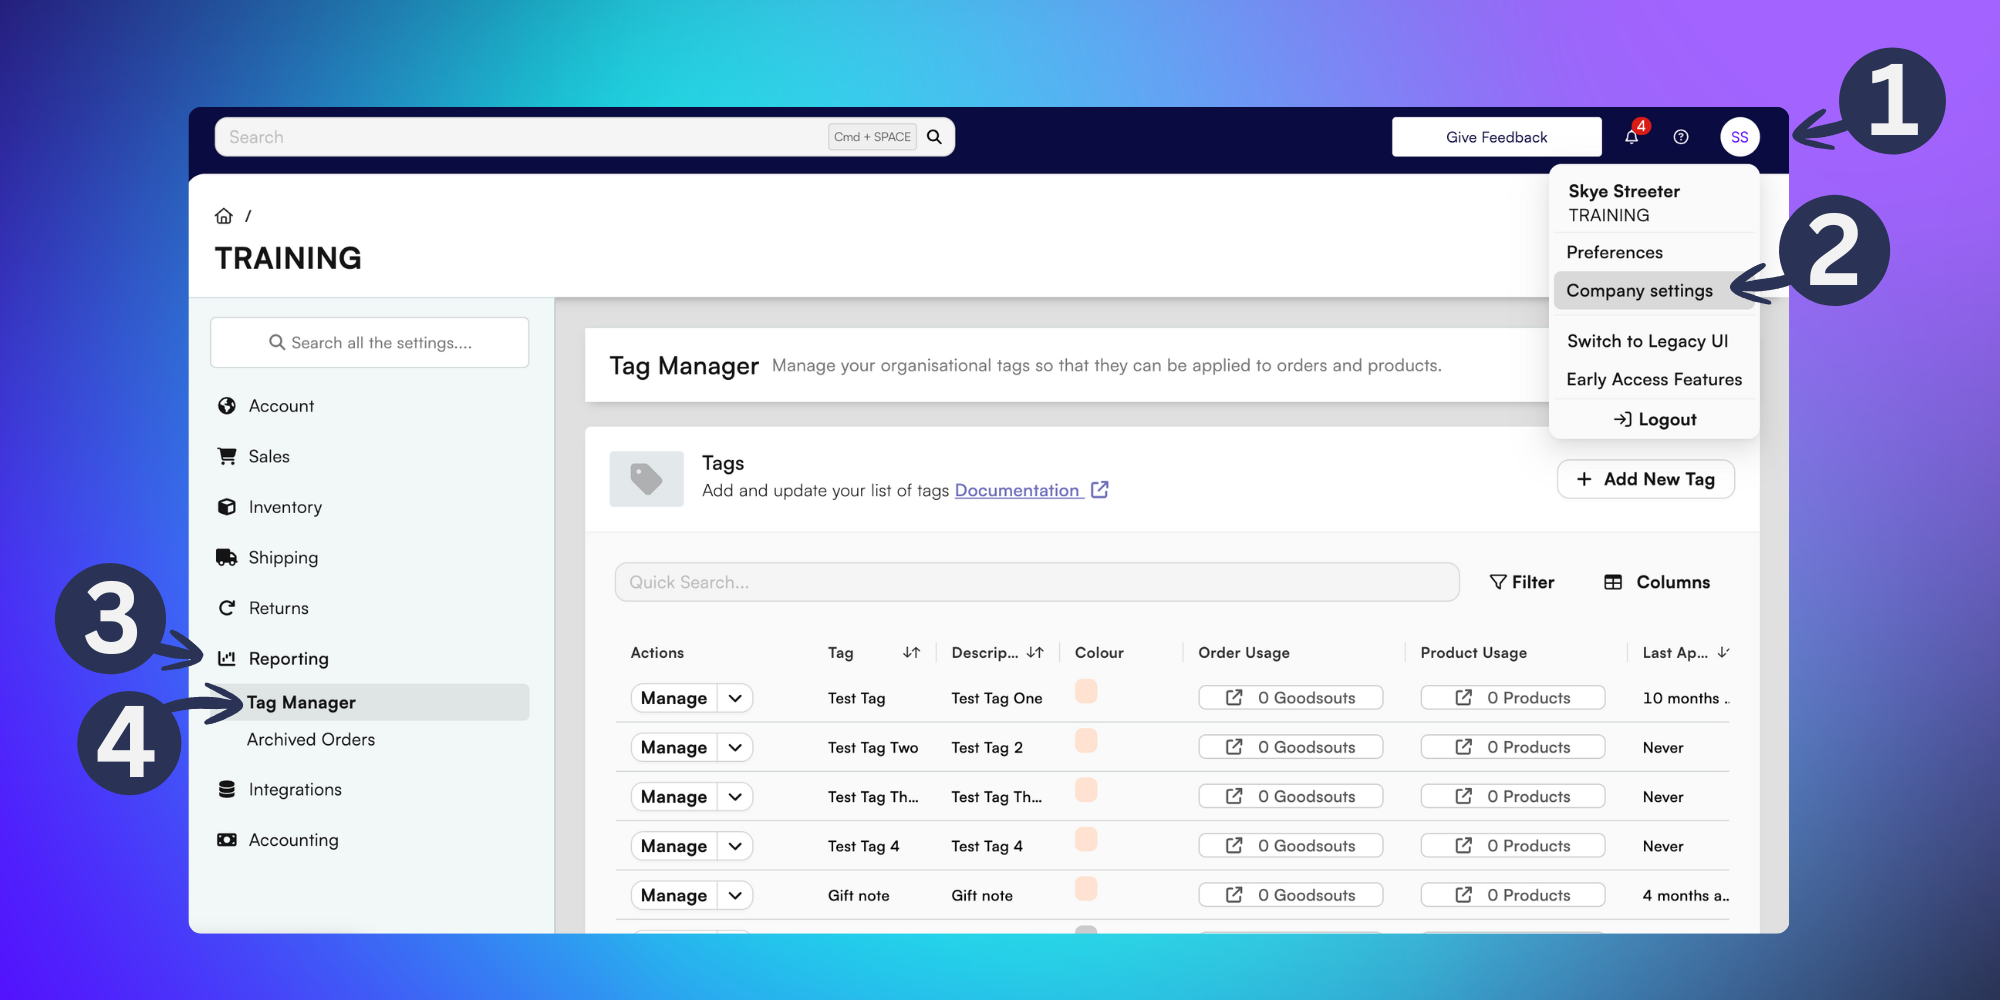
To access the Tag Manager click on your user initials in the top-right of BladePRO.
Click on Company Settings.
Select the Reporting tab in the left menu.
Then click on Tag Manager.
Using the Tag Manager
From the Tag Manager you can view all of the active tags across your BladePRO account, with the usage columns displaying how many goodsout or products the tag is connected too.
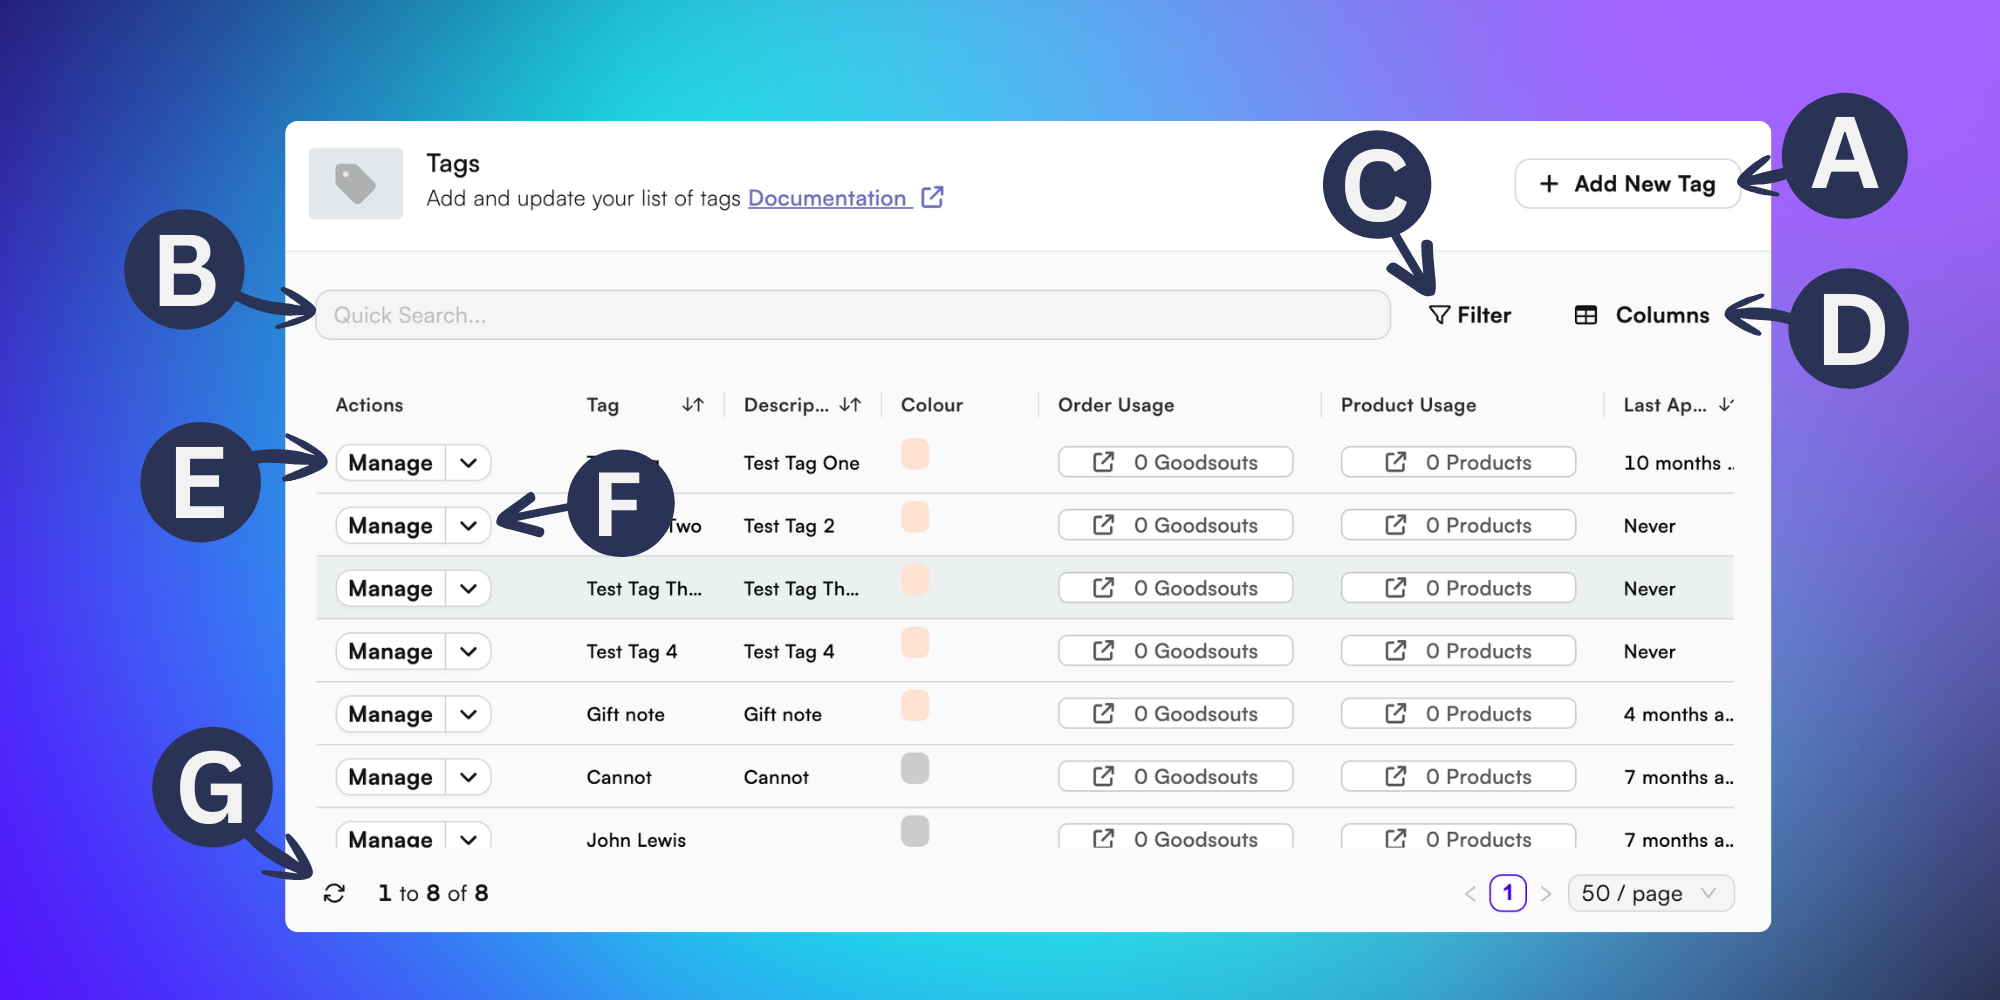
In the Tag Manager you can:
A) + Add New Tag - Create a new tag by typing a title and description into the popup menu.
B) Quick Search - Find tags quickly and efficiently by typing a name or description into the quick search field.
C) Filter - Click the Filter option to refine your tags list by adding a ‘last applied’ date range.
D) Columns - Click the Columns option to change the visibility of the tag manager by choosing which columns you’d like to display in your table, from a list of:
- Tag: This refers to the name or title of the tag.
- Description: A short summary of what the tag refers to.
- Colour: The colour of the tag in the goodsout or product pages.
- Order Usage: The number of active orders that have this tag applied.
- Product Usage: The number of active products that have this tag applied.
- Last Applied: When the tag was last applied to a goodsout or product.E) Manage - Click the Manage button to edit the name or description of your tag.
F) Delete - Click the dropdown arrow to see the option to delete your tag.
G) Refresh - Click the arrows icon to update the tag manager with live values.