Managing order timelines
The order timeline shows the journey of the order through the warehouse cycle since its creation. This article will show you how to find the order timeline, add messages to the order timeline and use filters to refine it.
Last updated 4 months ago
Finding the order timeline
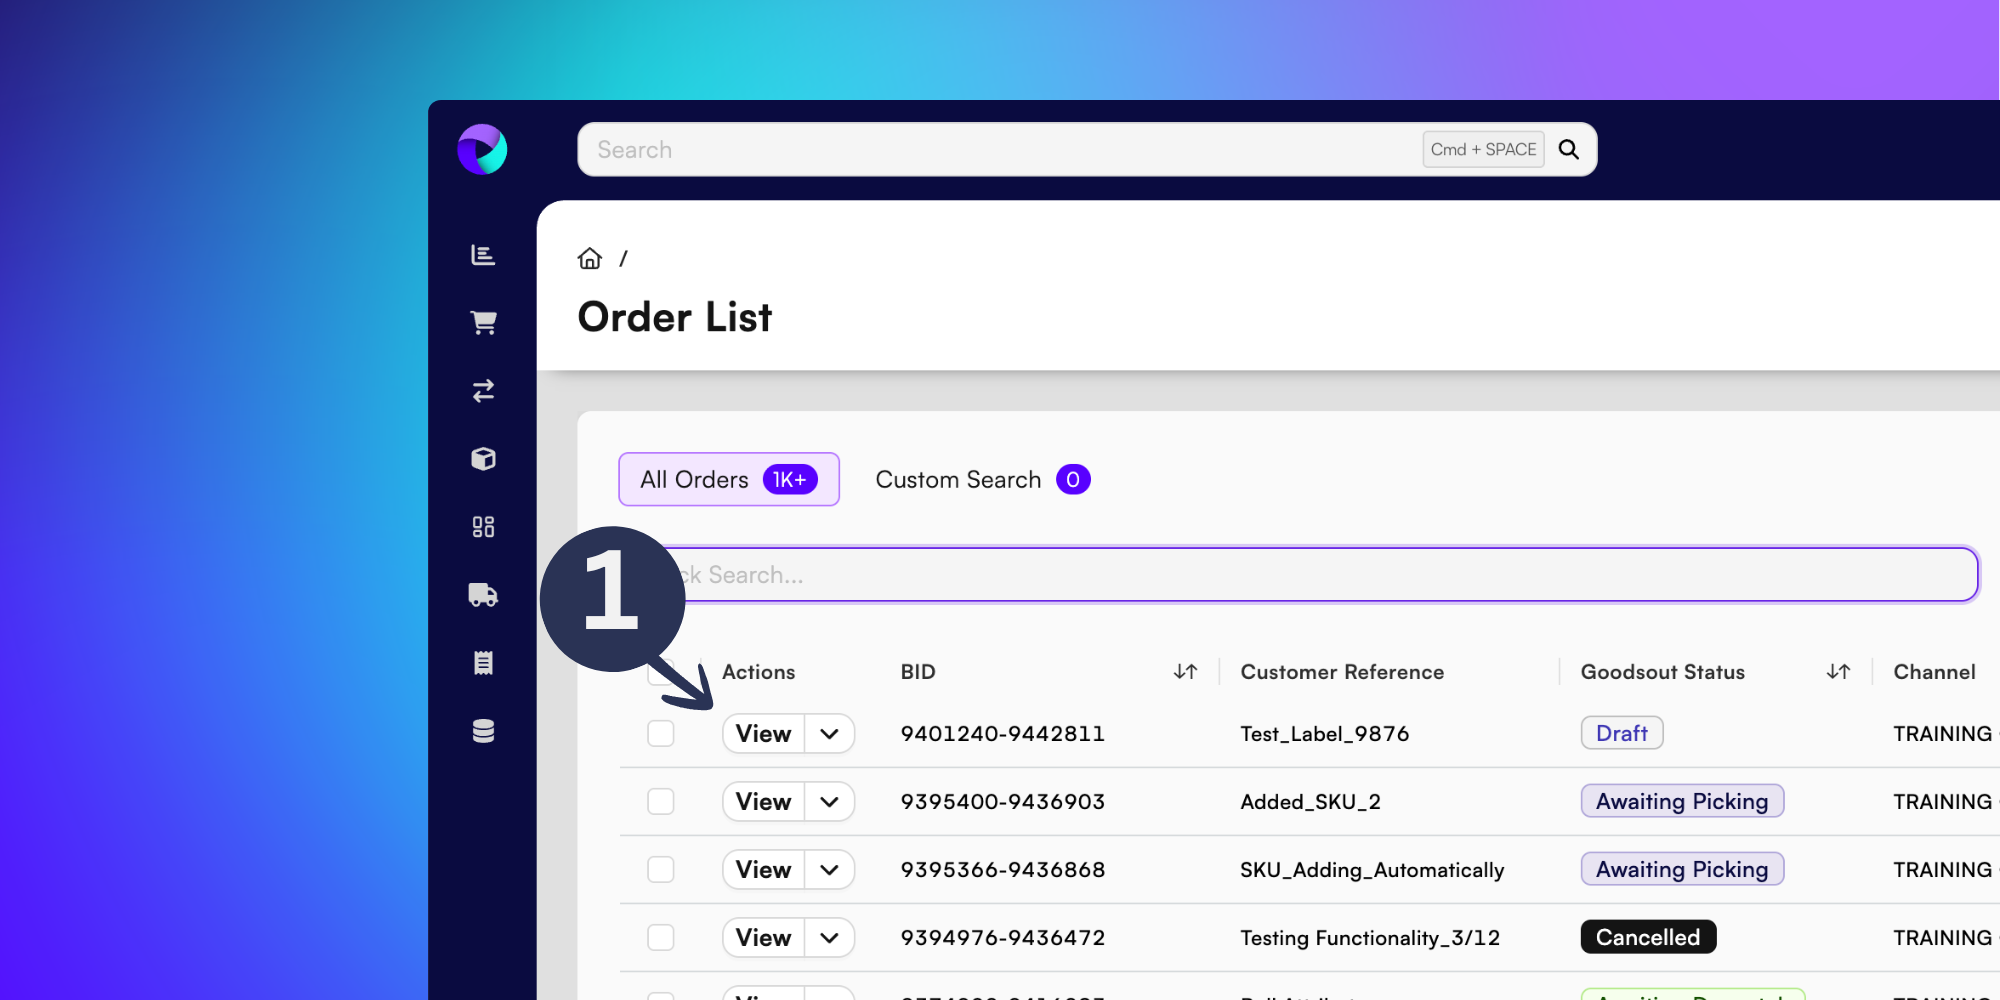
To find an order timeline, choose an order from the Order List page and click View.
The Order List page is the login landing page on BladePRO. To find it from another area of BladePRO, click Sales - the shopping trolley icon - in the left-hand menu.
Once inside the order Details page, click Timeline, as shown below.
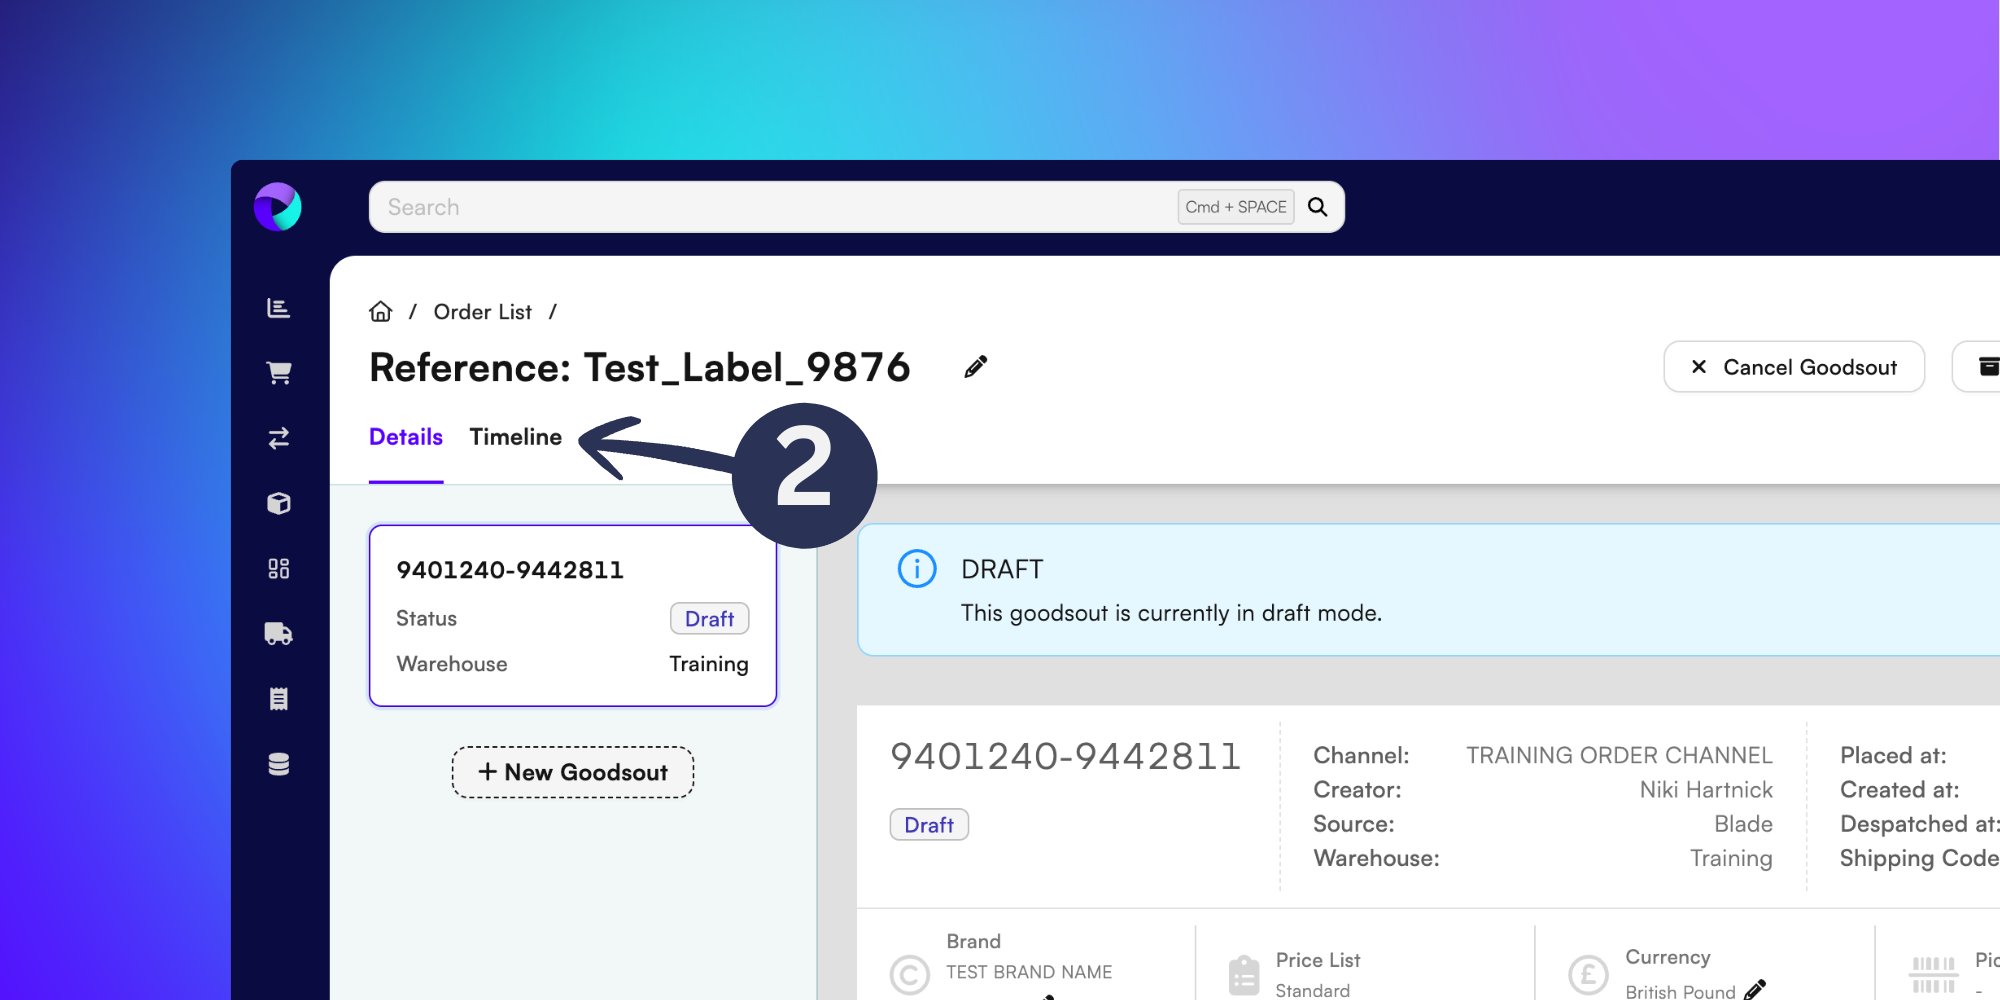
From the Timeline, you’ll be able to see all order updates, with the most recent at the top of the page. Each entry in the order timeline will contain:
Goodsout number
The area of the action
Date, time and location stamp
Organisation

Filtering the order timeline
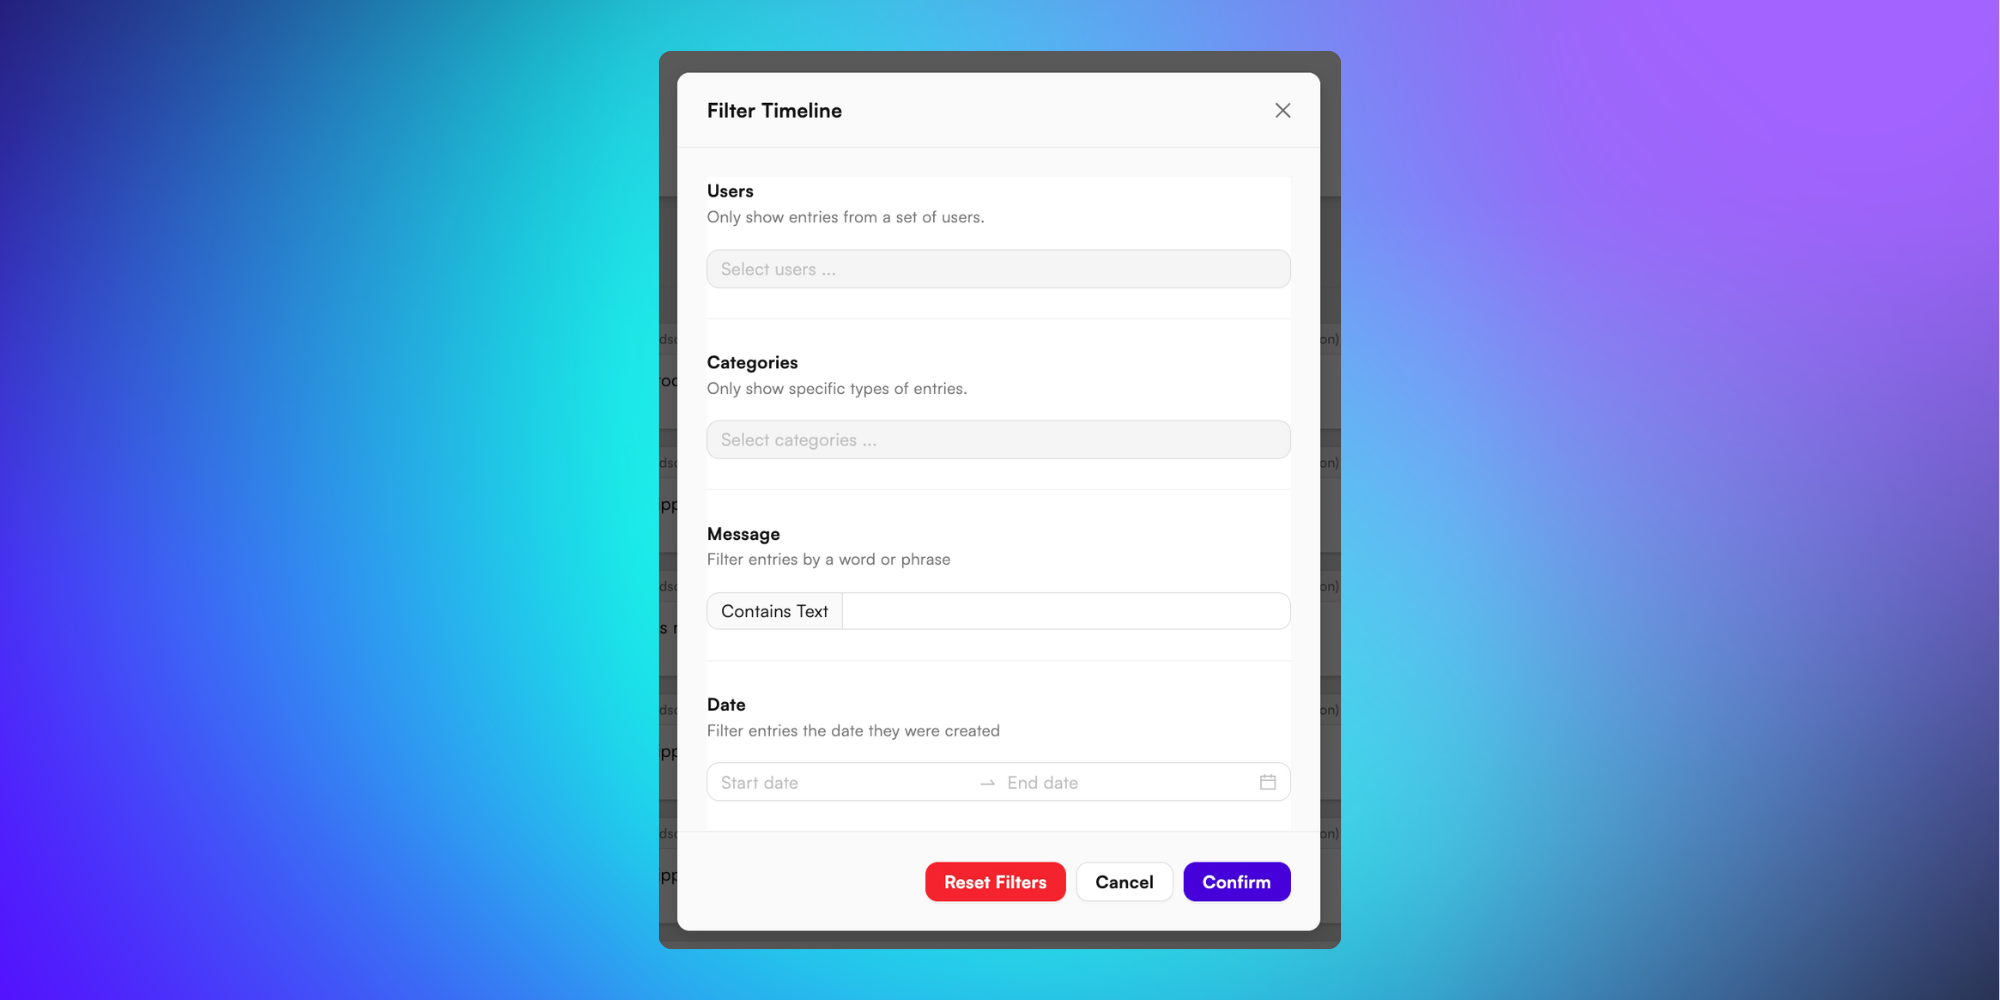
Click Filter Entries (3) to modify the order timeline to see your areas of interest. From this menu you can filter to:
Users - Show timeline entries made by selected BladePRO users.
Categories - Only show timeline entries from a specific category, choosing from a list of Products, Shipping, Tags, Goodsout, Order.
Message - Type a word or phrase into the text field to filter the timeline entries.
Date - Show timeline entries between your selected date range.
Click Confirm once you’re happy with your filters.
Adding messages to the order timeline
Click +Add message (4) and type your message into the text field.
Once happy with your message click Confirm to add to the order timeline.
Now you know all there is to know about order timelines!