Creating a purchase order
This handy guide will walk you through everything you need to know about manually creating a purchase order on BladePRO.
Last updated 4 months ago
Finding the Purchase Orders page
First click Products (1) in the left hand menu, then click Purchase Orders (2) in the popup menu.
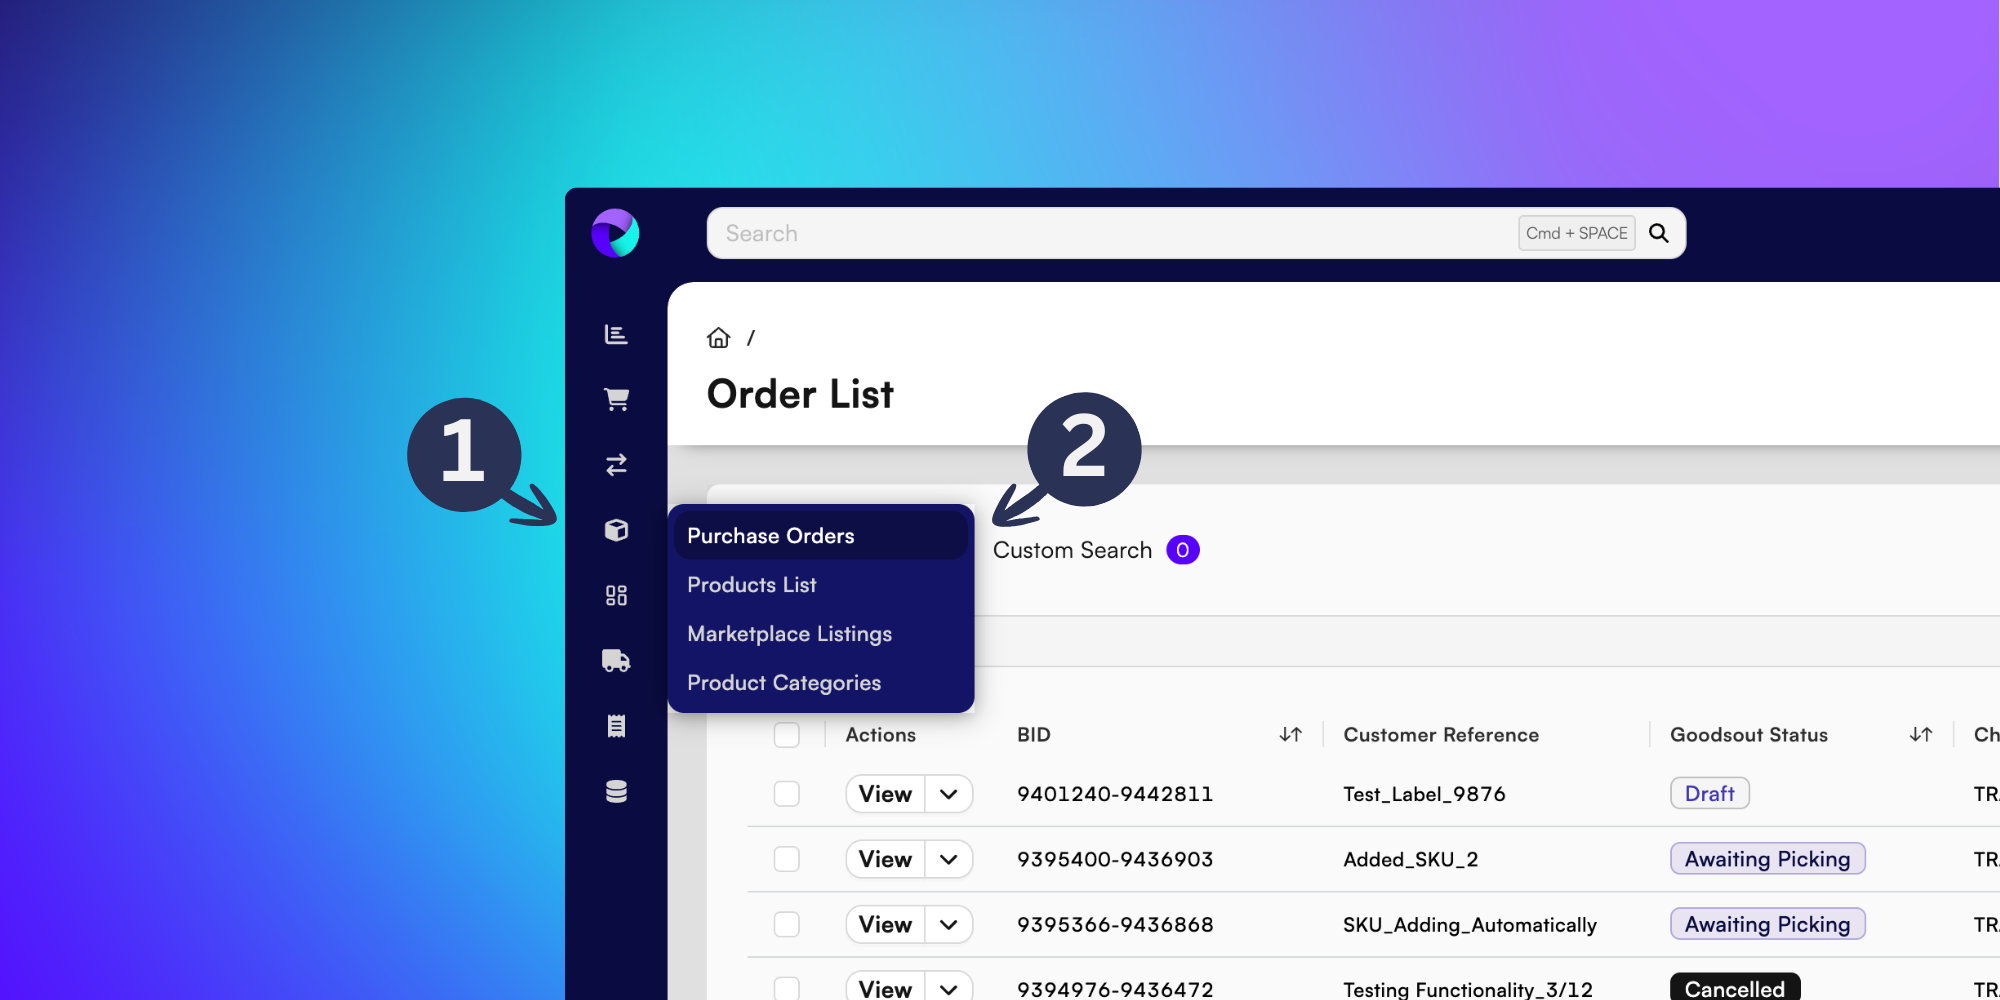
This will take you to the Purchase Order (PO) List.
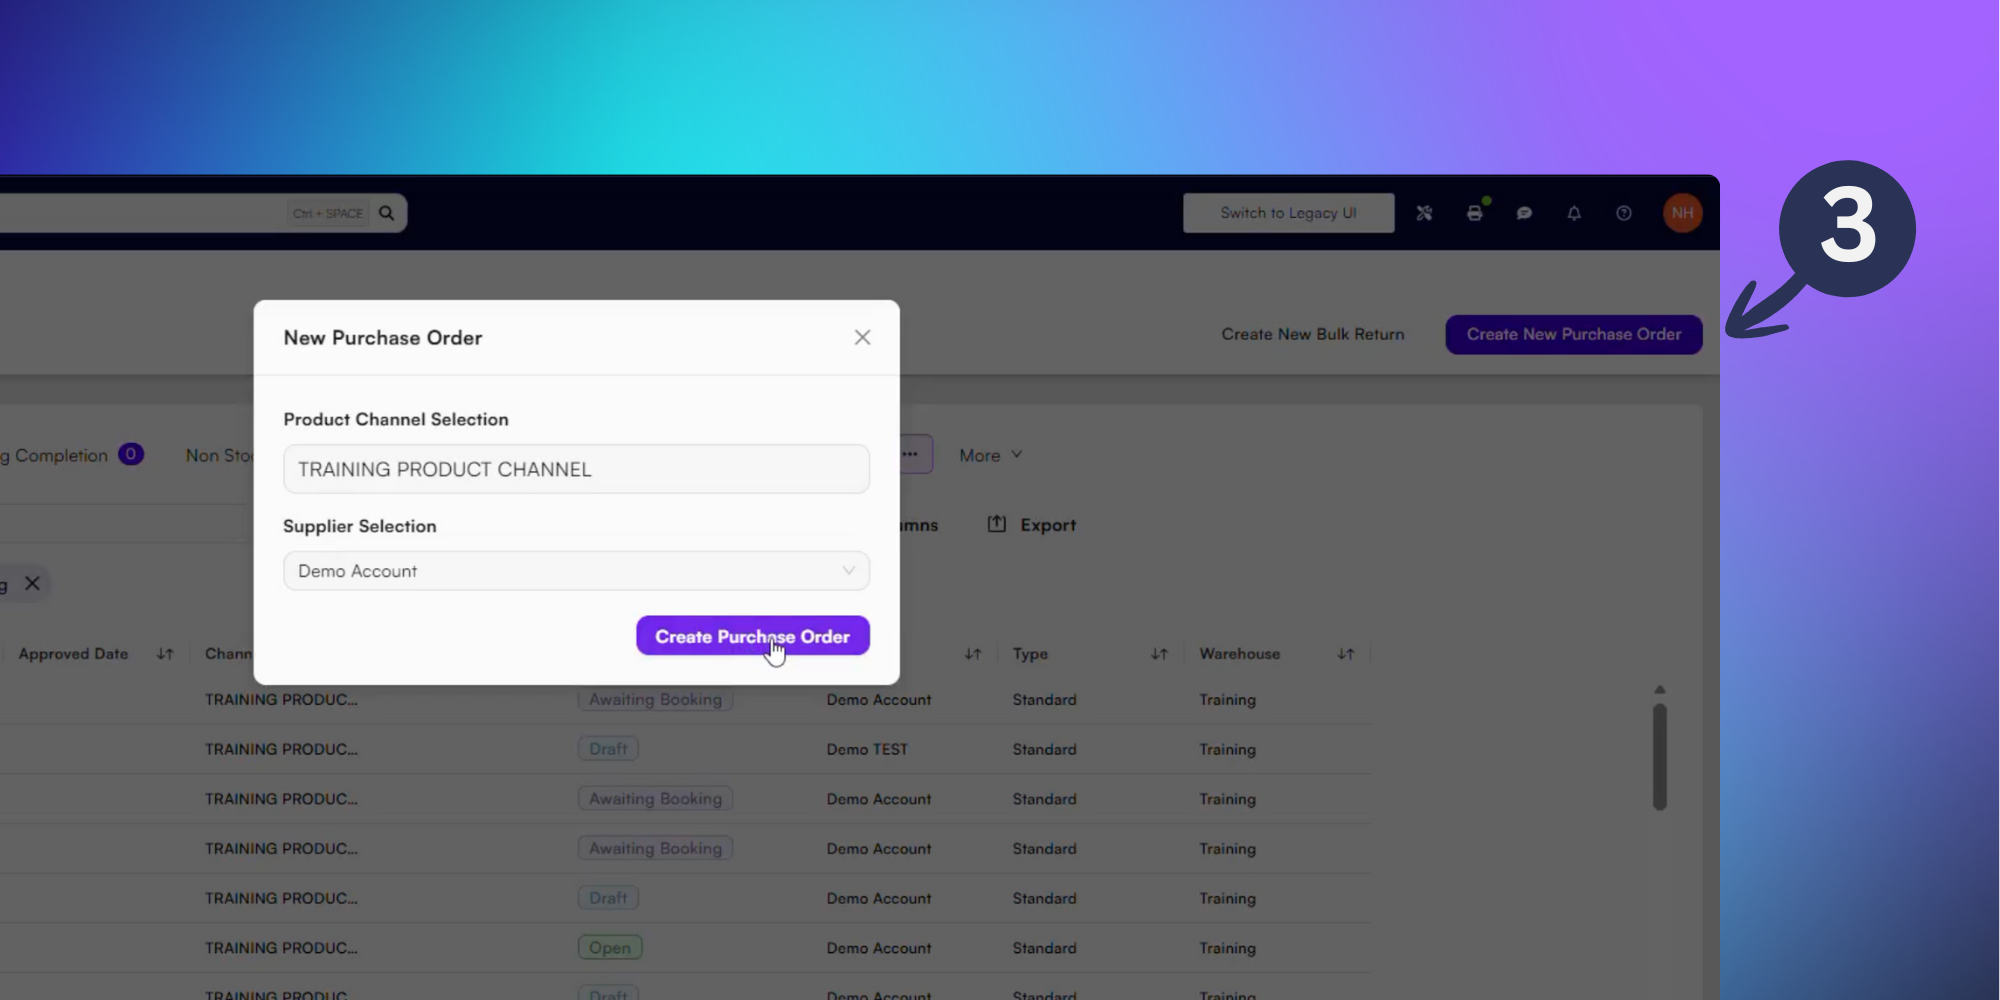
Creating your Purchase Order
From here, find Create New Purchase Order (3) at the top of the page.
Start to type the Product Channel into the text field and choose from the dropdown menu. Then select the Supplier from the dropdown list below.
Once you’re happy with your choices, click Create Purchase Order.
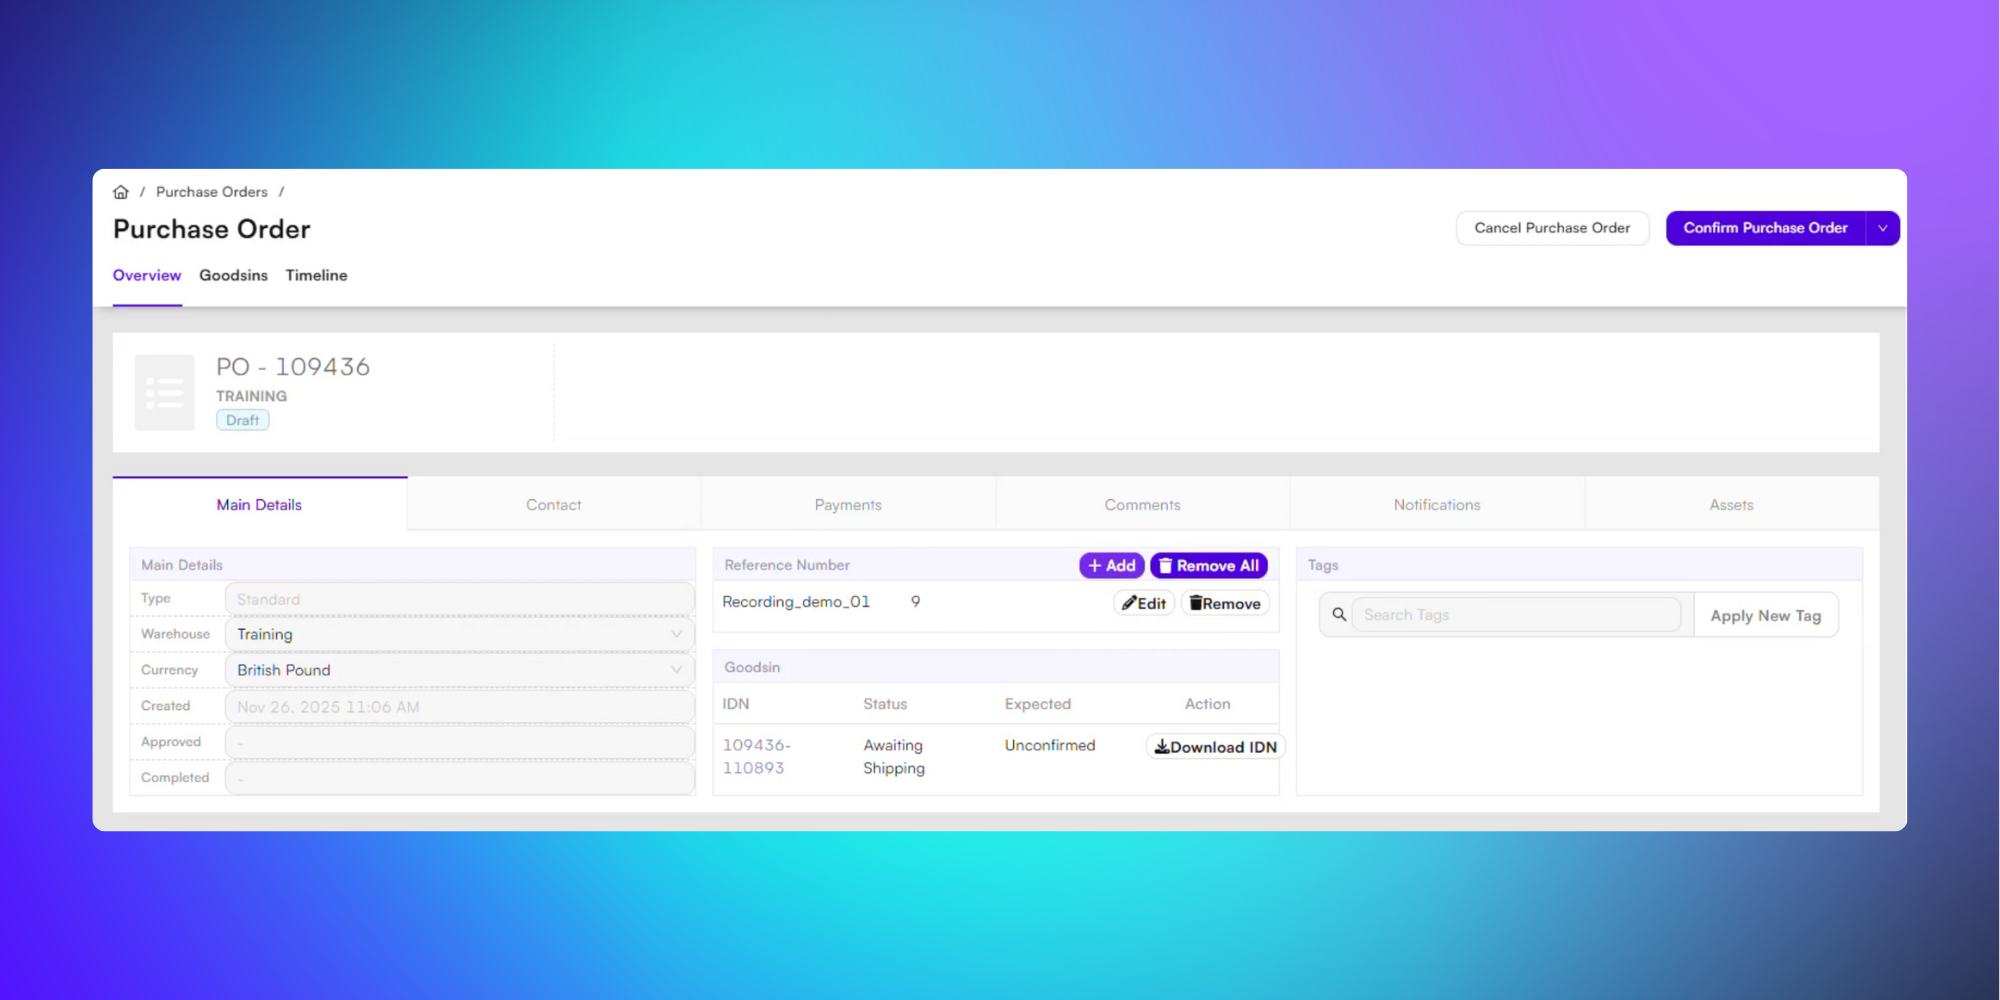
Once your Purchase Order is created, it’ll remain as a draft until it’s been confirmed. You’ll need populate the Main Details before you’re able to confirm your PO.
The platform will fill the form with default values, but you can update the following areas if required:
Warehouse - Choose which warehouse this PO is assigned to
Currency
Reference number - Click +Add and record the Reference Type and Reference Value.
There must be at least one reference number in order to confirm a purchase order.
Goodsin - Click Download IDN to save a copy to your device.
Tags - Categorise your new PO with attached tags.
Lines - Add products (SKUs) to your purchase order. We’ll show you how to do this below.
Populating your Purchase Order
Scroll down the page to the Lines tab and find products by typing your product name in the search bar and selecting it from the dropdown menu.
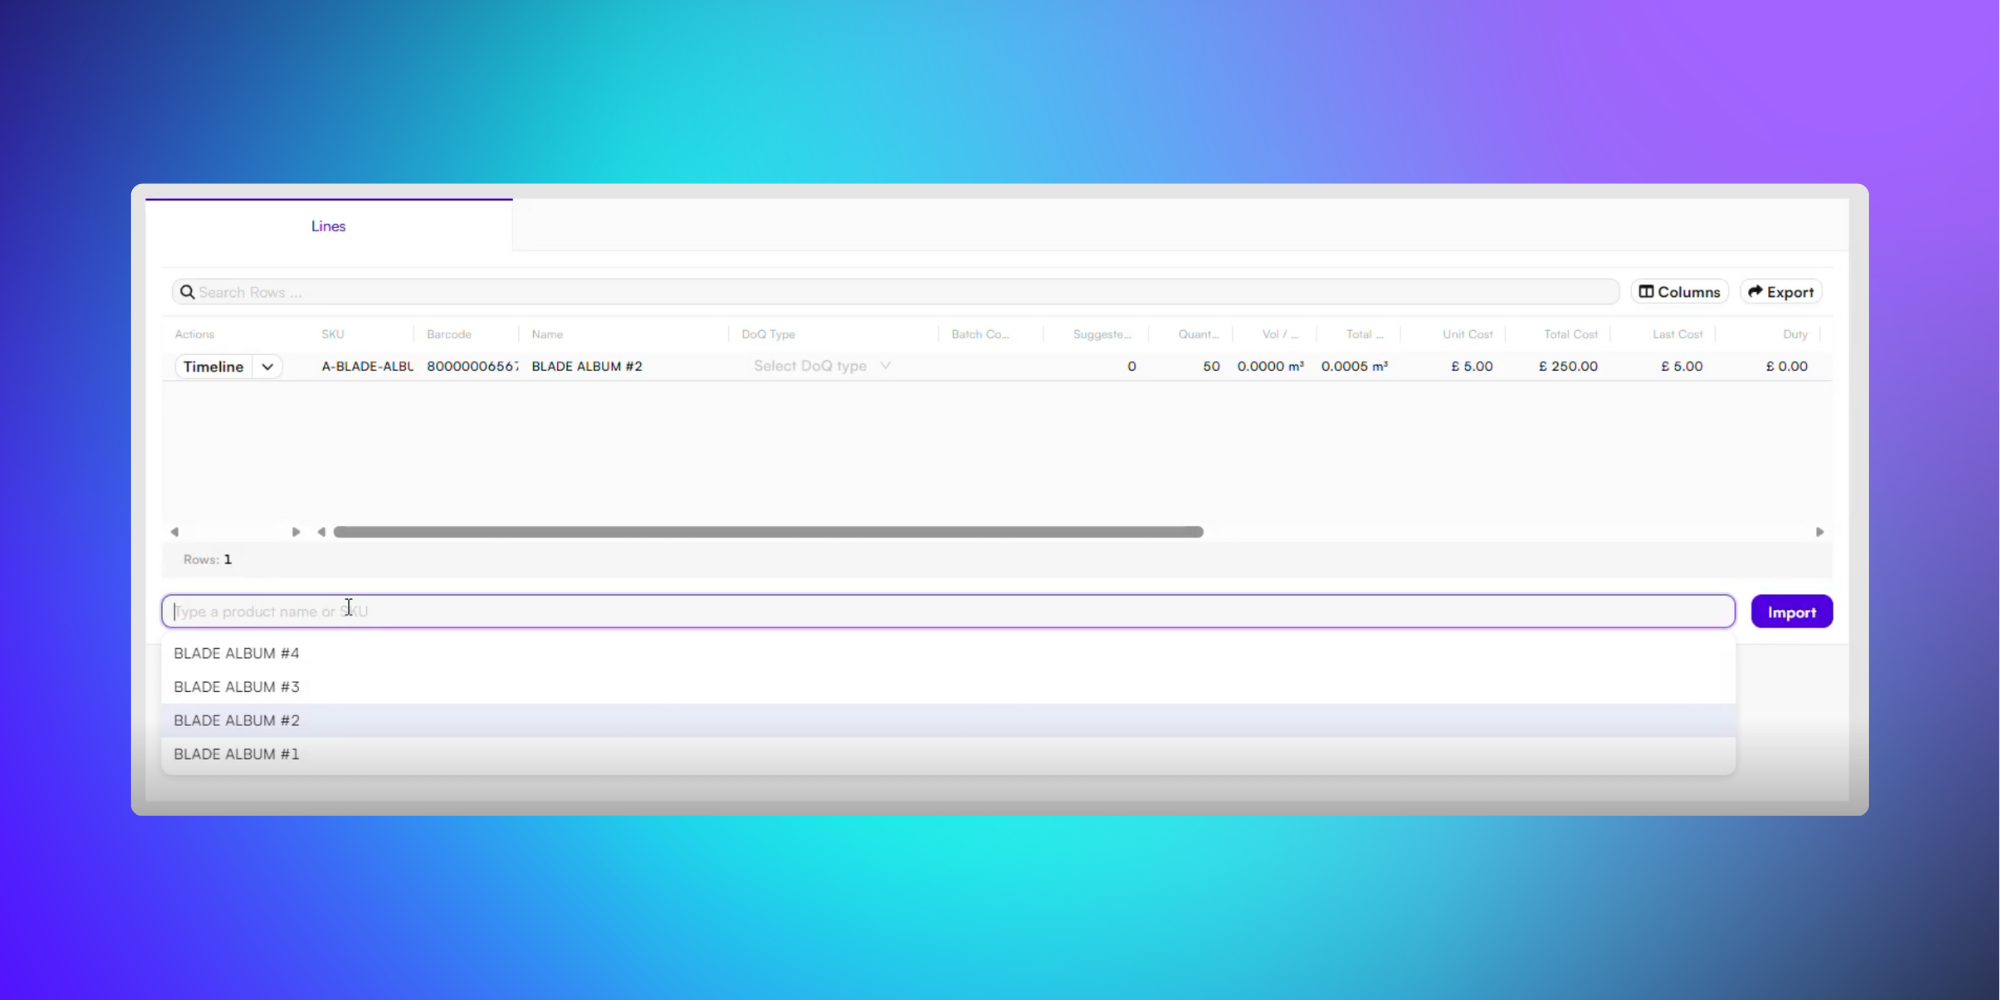
Once your line is active you can adjust the details, including:
Quantity - Number of inventory items included in the purchase order.
Unit cost - Price for a single item. This will populate automatically when added but can be updated.
Other interactive areas include:
Timeline - Add a timeline note to the SKU, or click the dropdown arrow to Remove or Print.
DOQ type - Change the size of the unit used in your PO.
Denomination of Quantity (DOQ) refers to the size of the unit in the purchase order. For example: single item, inner box, outer box. To update the DOQ type, the dimensions must already be set up.
Duty - Add a customs fee to your PO.
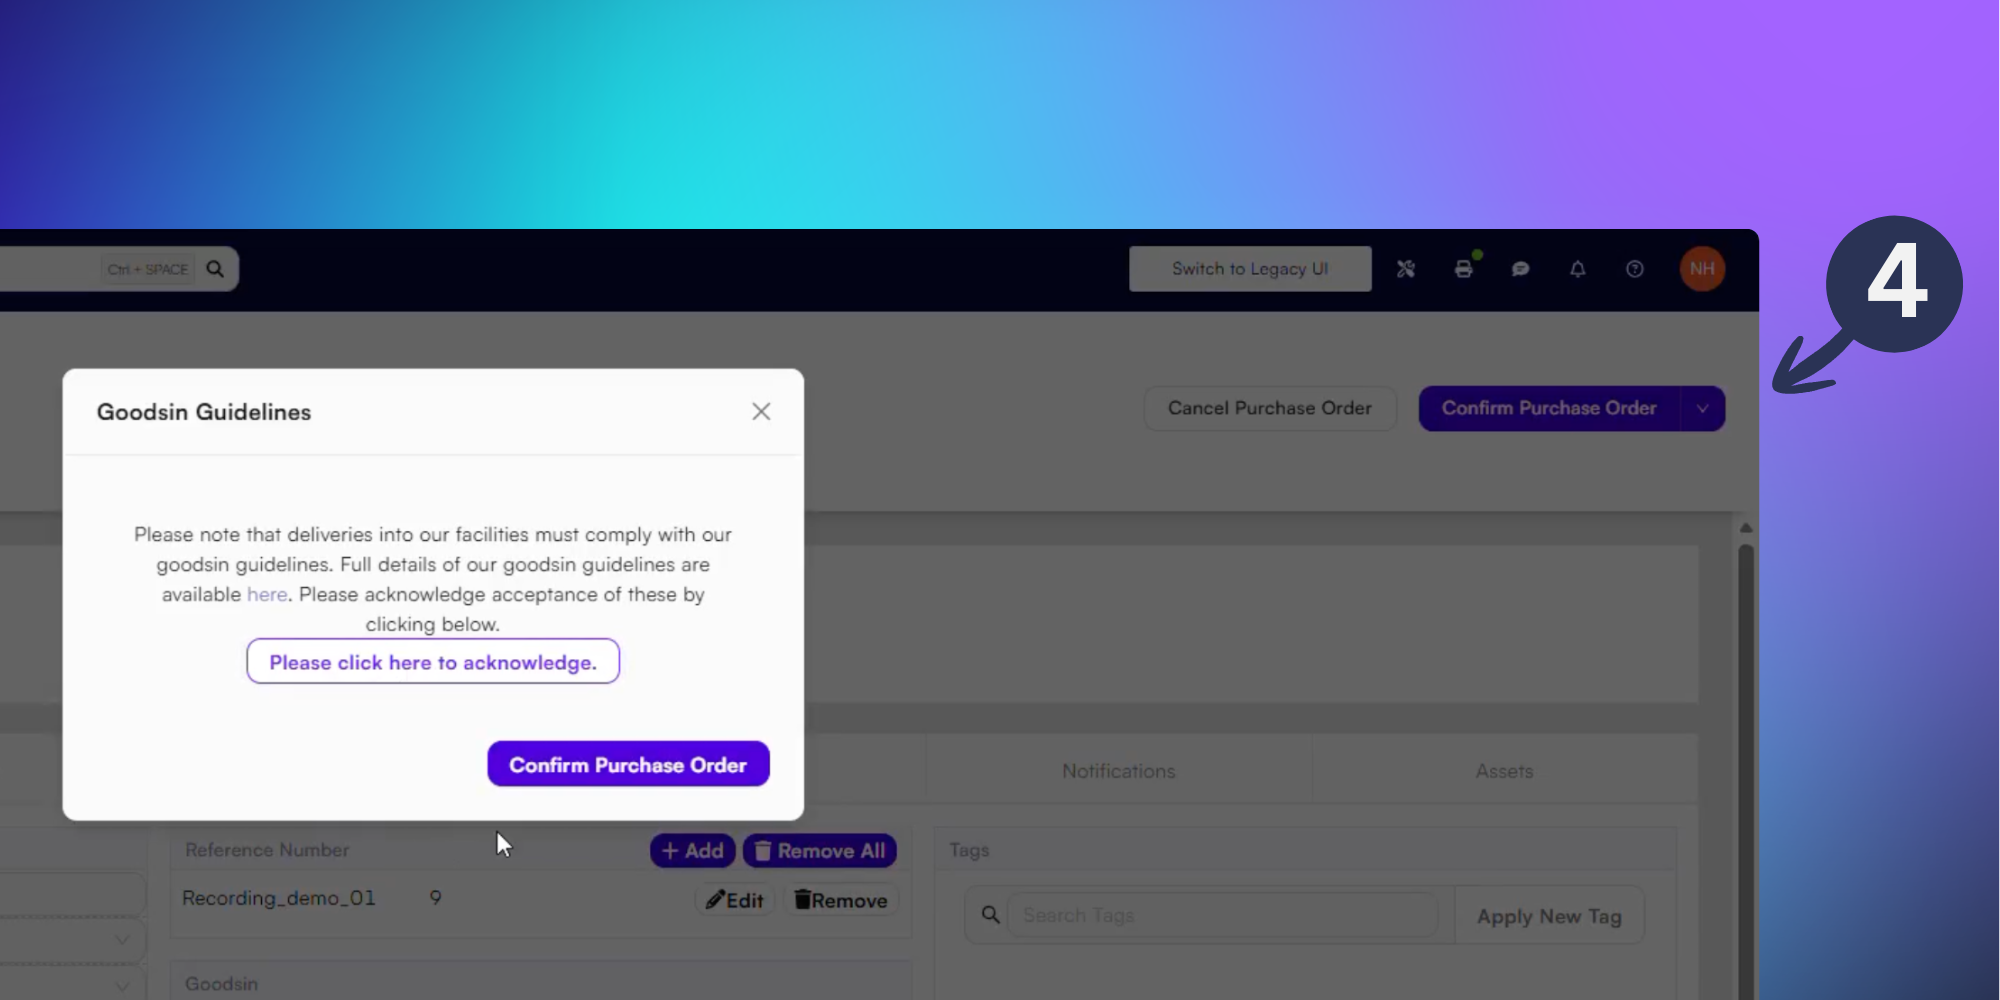
Once you’ve added the SKUs to the PO and checked all your details are correct, you can Confirm Purchase Order (4) using the purple button at the top right of the page.
Finalise your Purchase Order
Before finalising, you’ll be asked to acknowledge compliance with the goodsin guidelines, indicate compliance by clicking Please click here to acknowledge, then press Confirm Purchase Order.
Get stuck into more of BladePRO with these related articles:
Changing a warehouse - BladePRO