Adding a new product
This guide will walk you through the steps for adding a new product (SKU) into BladePRO.
Last updated 4 months ago
Before we get started, it’s important to note that we use product and SKU (Stock Keeping Unit) interchangeably on BladePRO - both are used to refer to the individual stock item that the warehouse will be handling.
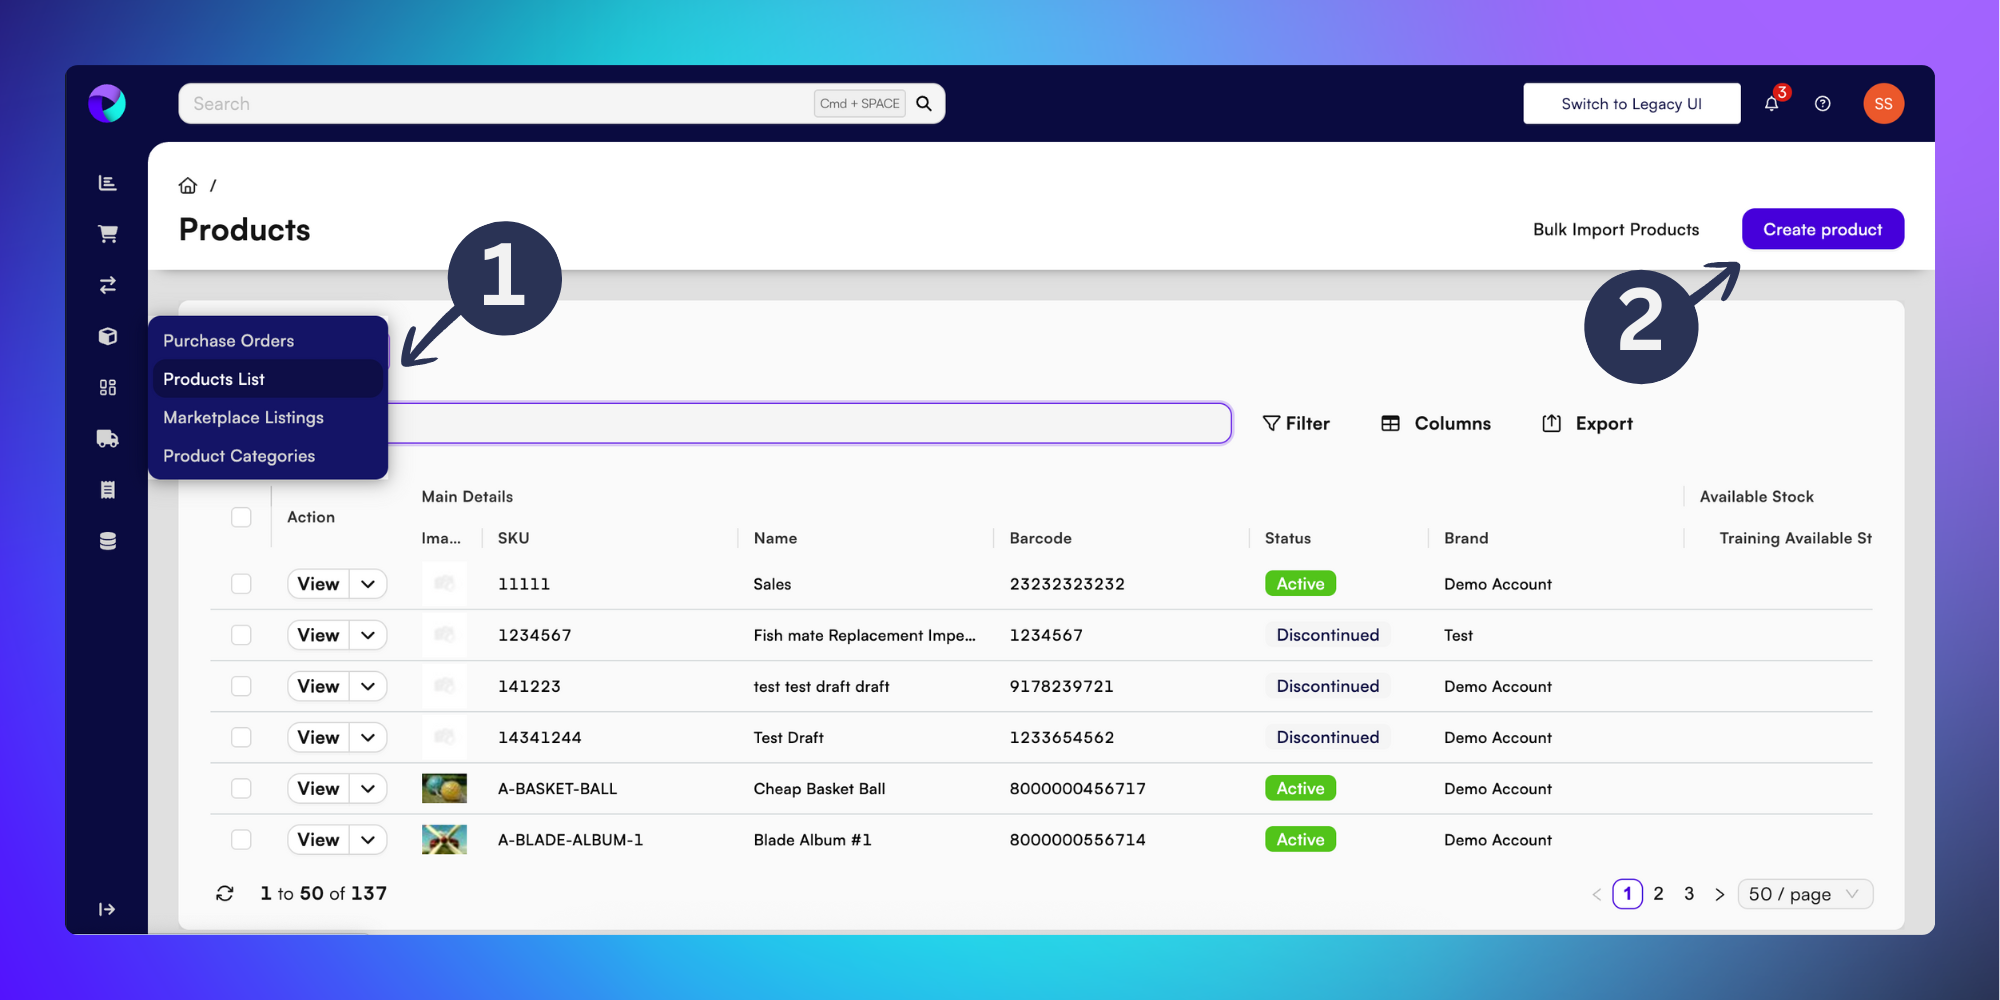
To add a new product into BladePRO, you’ll need to first find the Product List page by clicking Products in the left toolbar and selecting Product List (1) from the drop down menu.
Next, click the purple Create product (2) button in the top-right of the Product List page.
The Create Product window will take you through 5 steps to build your new product into BladePRO:
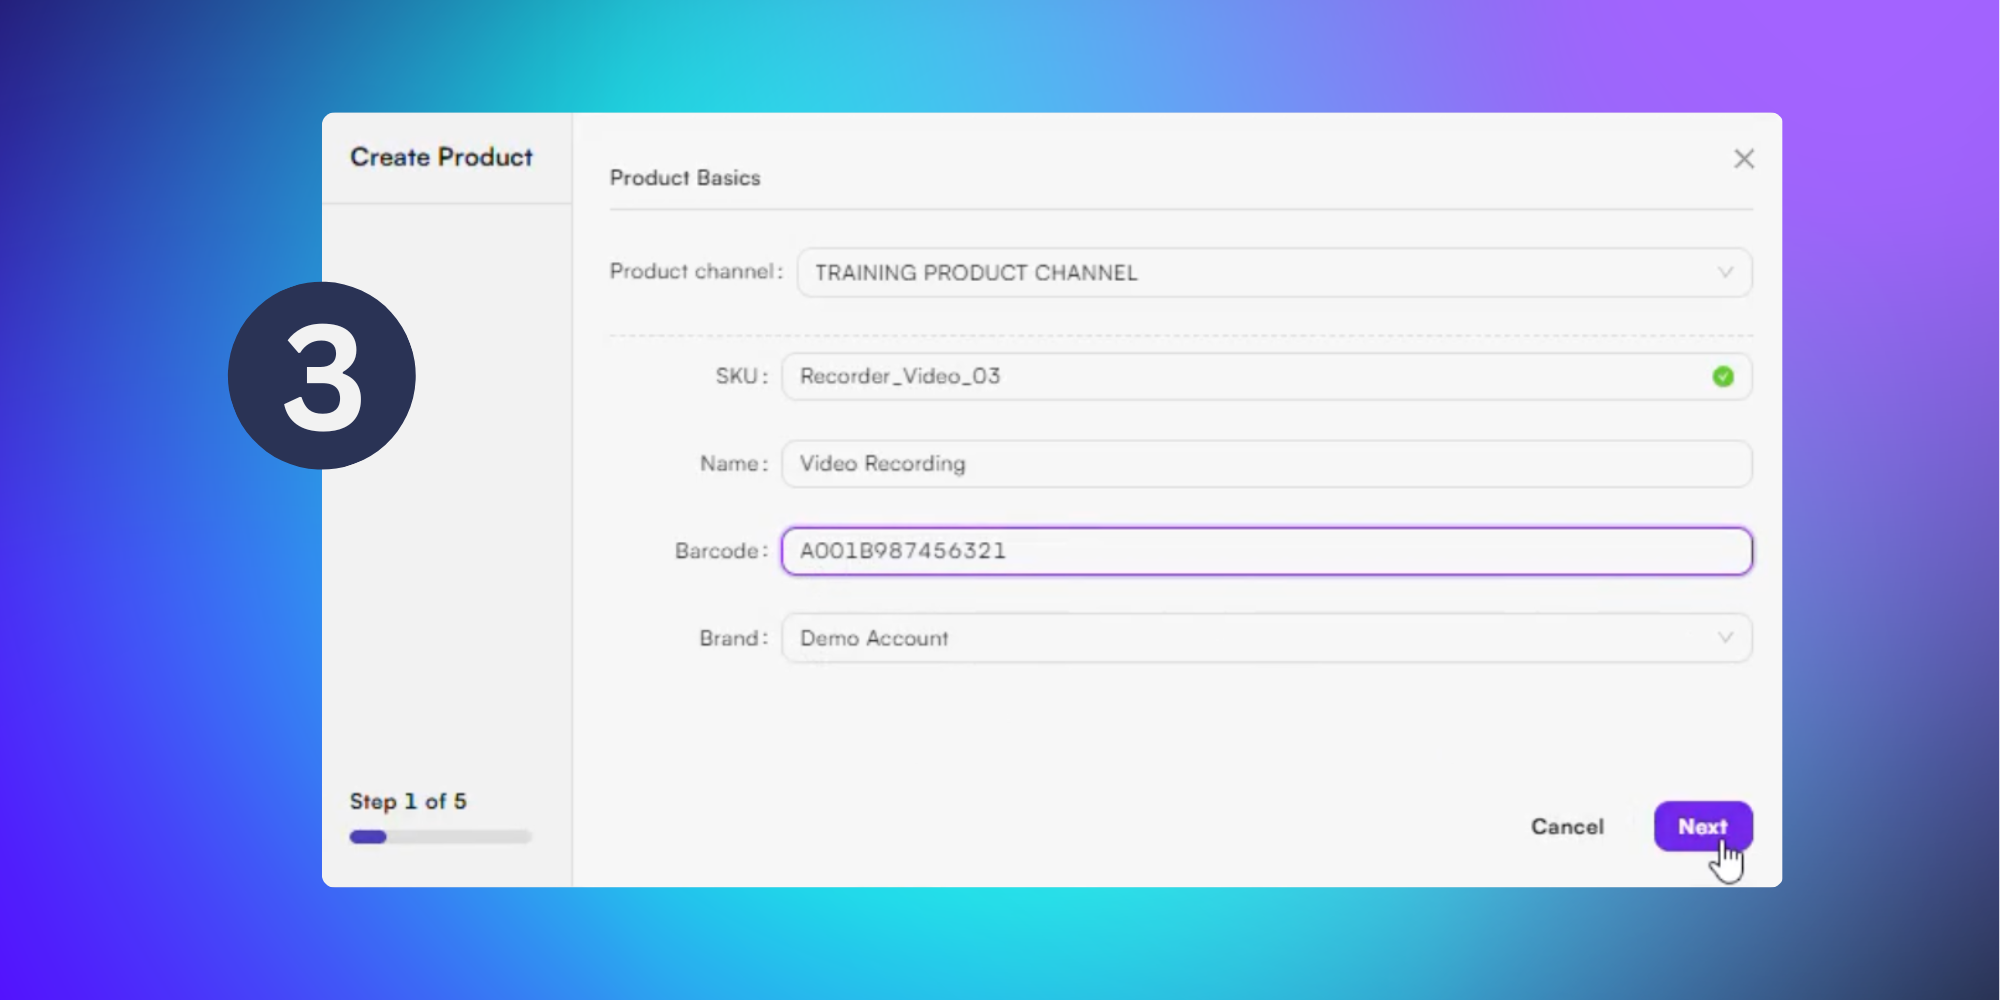
Step 1 asks you to fill in the:
Product channel - Choose from a dropdown list of preconfigured product channels.
SKU - Unique identifying name for the product.
Name
Barcode
Brand
Click Next.
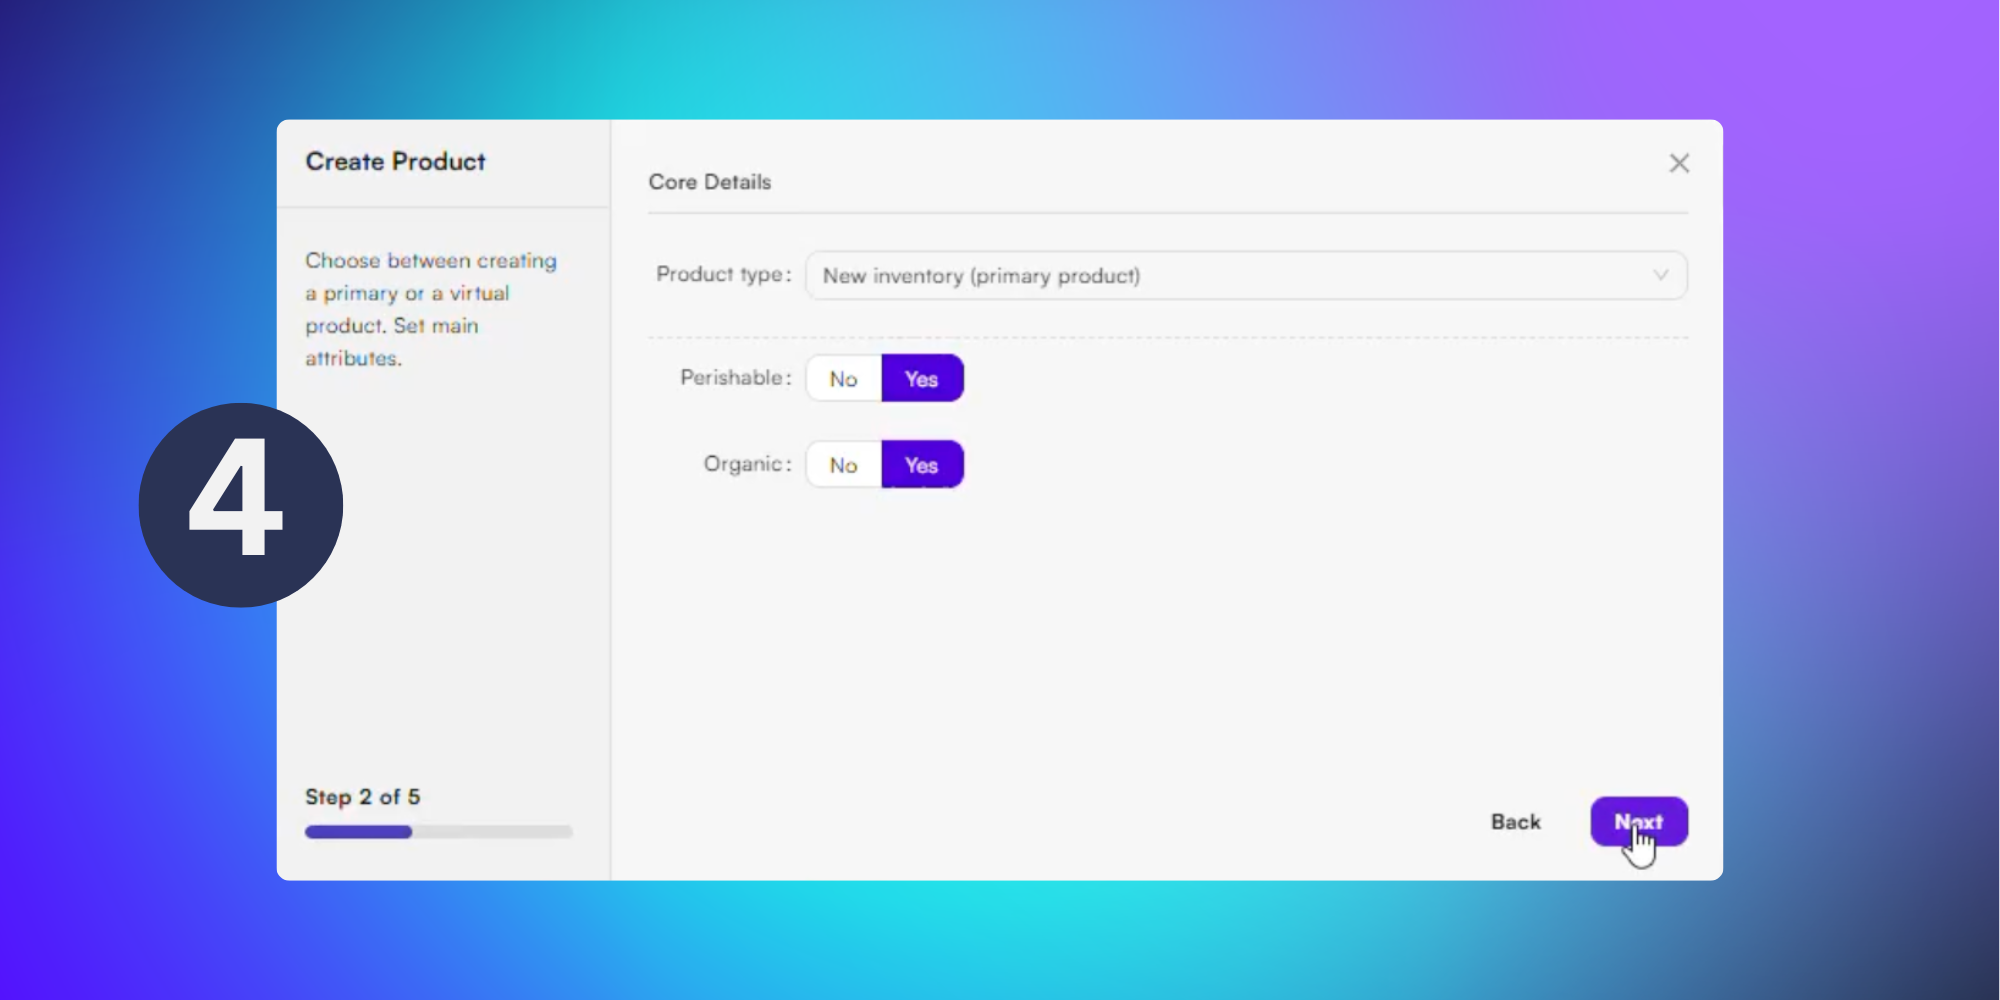
Step 2 asks you to add the Core Details, choosing between a primary and a secondary product.
Click the No or Yes buttons to indicate whether your new product is Perishable or Organic. Once selected, move to the next step by clicking Next.
A primary product refers to a physical product in your warehouse inventory, where an
existing inventory (virtual product) will add to your inventory as a group of existing items (a bundle).
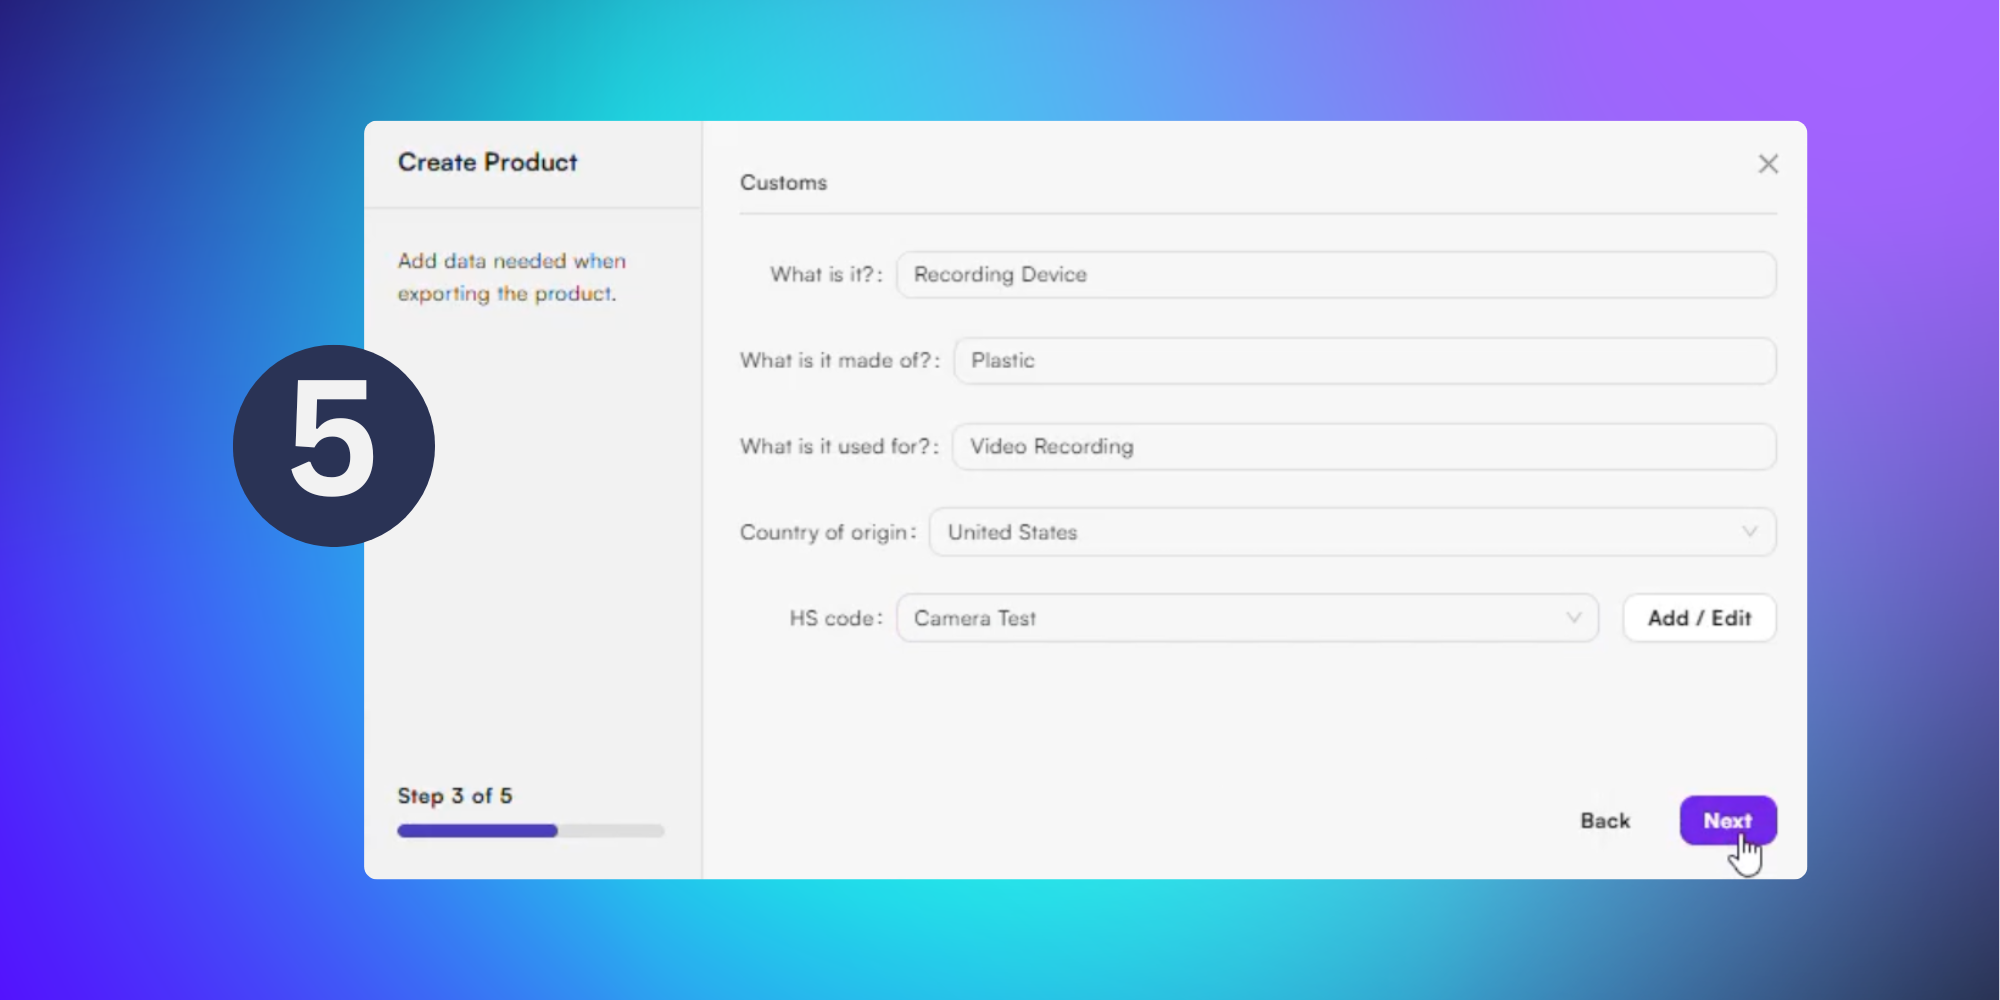
Next, you’ll need to add the customs information into the form, indicating:
What the product is
The material it’s made from
What it’s used for
Country of origin
HS code - Create a new code by clicking Add, or click Edit to modify an existing code. To use an existing code, type it into the textbox and select the code from the dropdown menu as it appears.
The Harmonised Systems (HS) code is your product’s universal ID number used in global trade so customs knows exactly what item is being shipped.
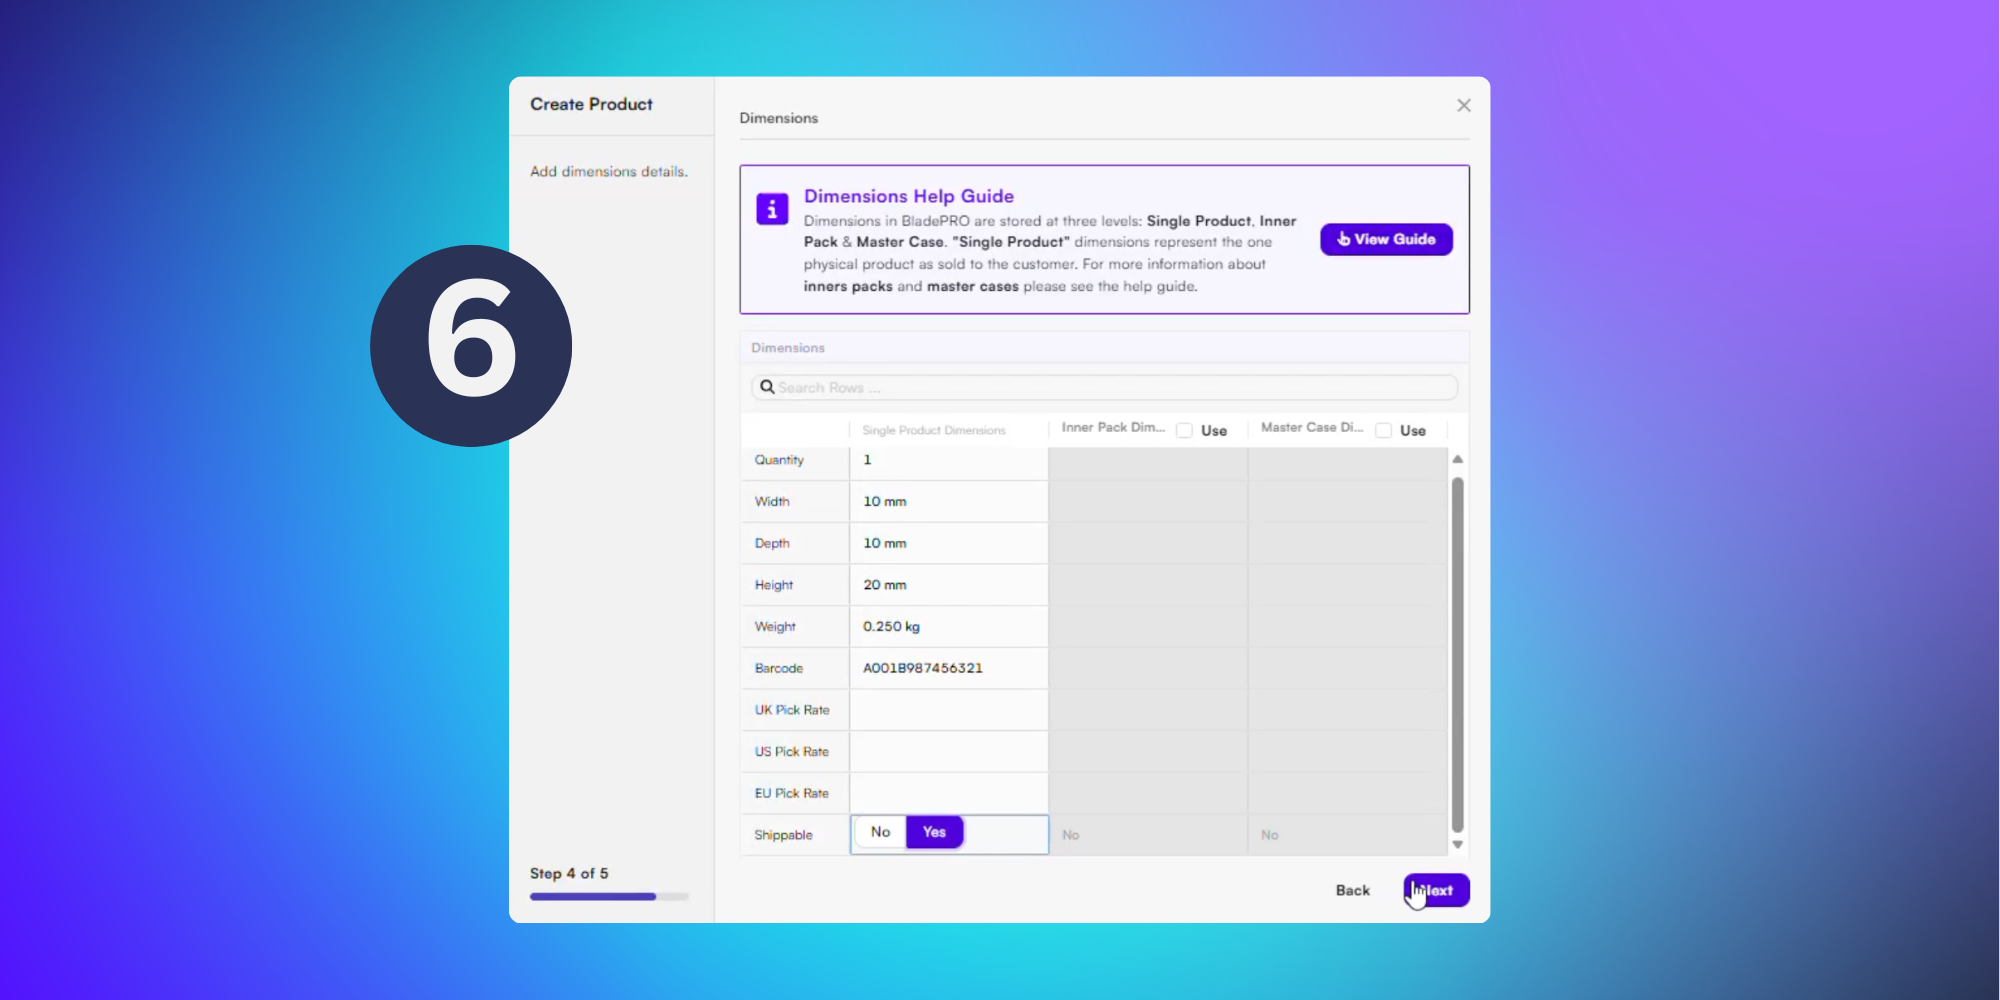
Then, you’ll need to add your new product’s Dimensions.
The Single Product Dimensions column on the left must be filled out, with compulsory fields being:
Width
Depth
Height
Weight
Shippable
The Ship Rate cells are not compulsory but we’d recommend adding the information if you have it to hand.
If you’re unsure how to use the Inner Pack or Master Case dimensions, BladePRO has a useful Dimensions Help Guide - click View Guide in the platform to learn more.
Once you’ve filled in your product dimensions, click Next.
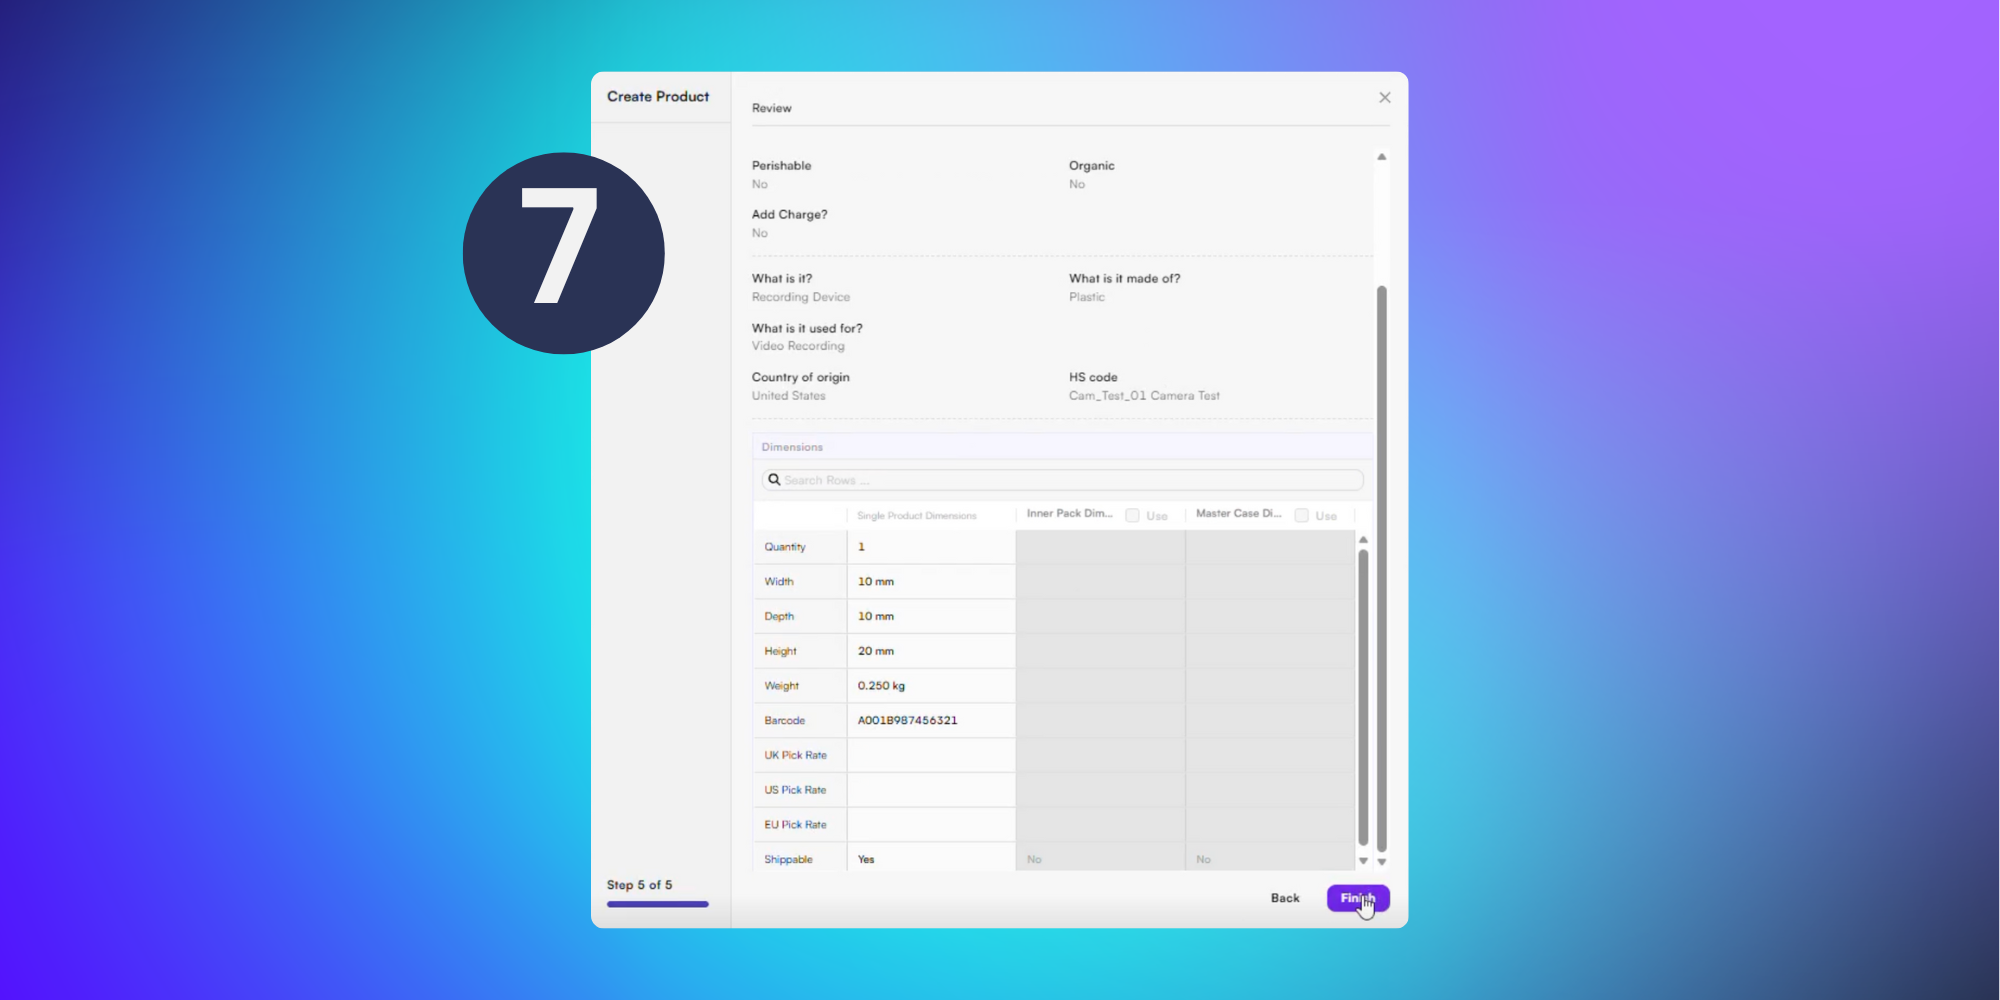
The final stage provides a summary of your new product details. Review the information and click Back to adjust, if necessary.
Once you’re happy, click Finish to add your new SKU to BladePRO.
Now you’ve added some products into BladePRO, let’s find out how to manage them!